Page History
...
Connecet the board via usb cable to your demo host computer.
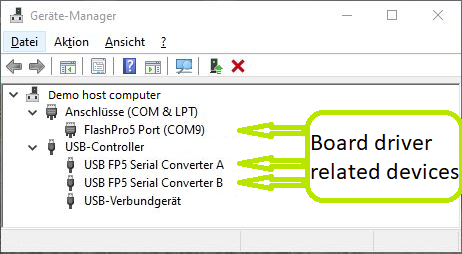
Check in the Windows Device Manager the appearence of the tree board driver related devices:
- FlashPro5 Port (ComX)
- USB FP5 Serial Converter A
- USB FP5 Serial Converter B
The Device Manager is accesible via "Right mouse click context menue" from the Windows Start Menu Button.
Check the usb driver installation
Connect the boards ethernet port to your demo host computer. The demo is confiured to establish a network connection via the DHCP protocol, therefore a free router / network port can be used.
A direct port to port connection between the demo host computer and the board is also possible but requires to reconfigure the software project.
...
In the upper left section of Libero, select the tab "Design Flow" and flash it to the board via "Program Design > and double left mouse click onto Run PROGRAM Action".
Warnings can be ignored.
The hardware design is volatile and therefor therefore lost when powering the board down.
Software project flashing
Open SoftConsole 6.2 and point the "Workspace:" to the folder "SmartberrySoftconsole-6.2" inside the demo folder.
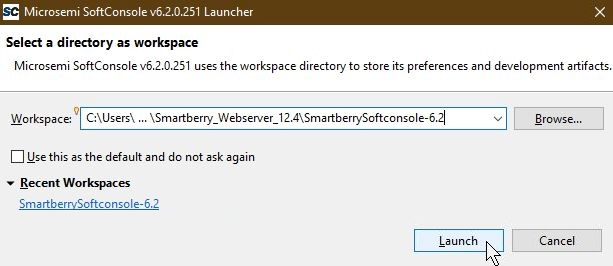
Subsequently the program opens.
The SoftConsole display to the left the projects which the Workspace contains.
The two demo projects "Smartberry_Webserver_6.2" and "Smartberry_Webserver_DDR_6.2" are identical variants of the demo, they only differ in the memory location.
The first one is stored in embedded non volatile memory (eNVM) and the later is stored volatile in the external DDR ram and therefore lost during power down.
Before flashing the demo, open a comport terminal to the boards comport, so that its messages about the used IP Adress and Mode can be captured.

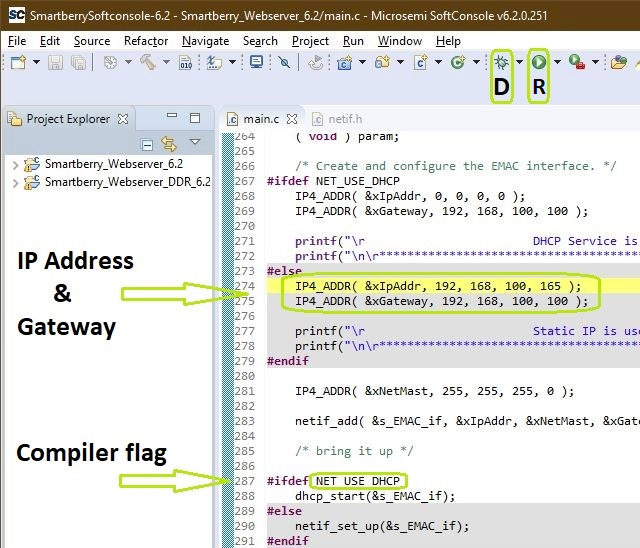
To simply run the demo press the triangle right to the button marked with a "R" in the picture above and select the variant of the demo.
Pressing the triangle next to the button marked with "D" let you select which variant to be executed in debug mode.
Debug controlls - Resume - Pause - Stop
![]()
Switch between Debug and Run perspective (upper right corner program window)
![]()
Static IP configuration
To disengaging the DHCP mode one has to setup up an IP Address in the code unit "main.c" line 274, a gateway address has is not required.
Furthermore the corresponding compiler flag needs to be deleted (optional renamed) in the project setting. To do so, in the "Project Explorer" tab, right mouse click onto the project and select Properties in the appearing menu.
In the left section of the properties window select "C/C++ Build > Settings" in the right section select the tab "Tool Settings > GNU ARM Cross C Compiler > Preprocessor" under "Defined symbols (-D)" delete the compiler flag "NET_USE_DHCP" and press "Apply". Confirm the following dialog and press "Cancel".
Lastly, the project needs to be recompiled. In the top menu of the SoftConsole select "Project > Build ALL / Build Project".
Warnings can be ignored
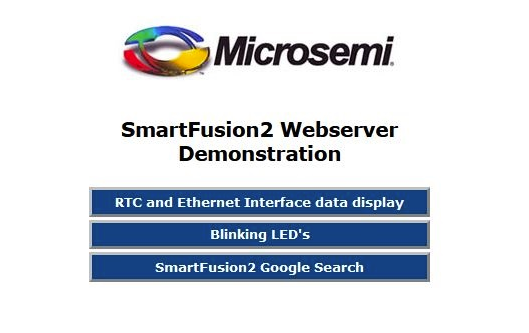
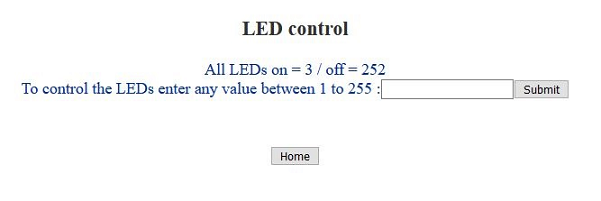
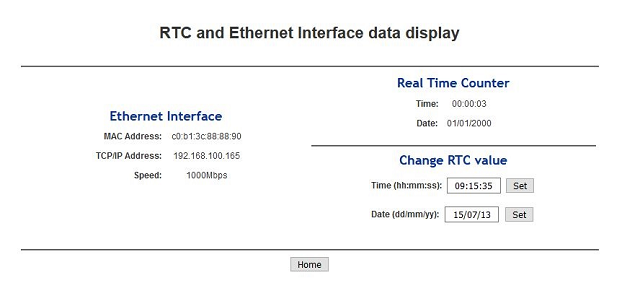
Demo usage
Open a new tab in a web browser and enter the IP Adress from the comport terminal.
Design Flow
| Page properties | ||||
|---|---|---|---|---|
| ||||
Notes :
|
...
Overview
Content Tools