Page History
...
Design Flow
| Page properties | ||||
|---|---|---|---|---|
| ||||
Notes :
|
The reference design is available as a prebuild zip archive, which contains hard and soft ware project folders and the board configuration file "microsemi-smartfusion2-smartberry-ddr.cfg" . It was created and tested in windows environment.
...
Connect the boards Ethernet port to your demo host computer. The demo is configured to establish a network connection via the DHCP protocol, therefore a free router / network port can be used.
A direct port to port connection between the demo host computer and the board is also possible but requires to reconfigure the software project.
Launch
| Page properties | ||||
|---|---|---|---|---|
| ||||
Note:
|
Programming Hardware design
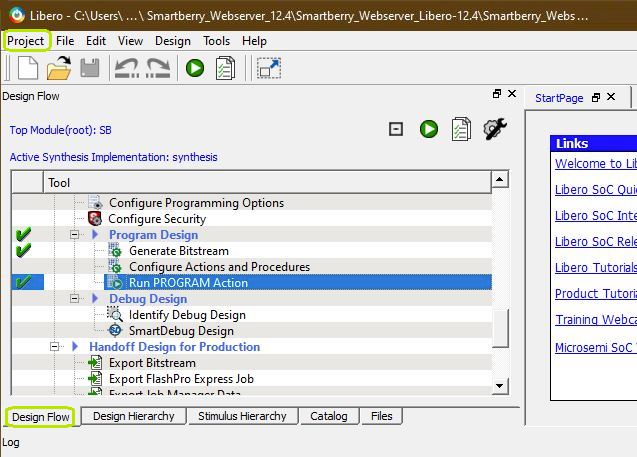
Open Libero 12.4, in the to left corner, open the demo hardware project via "Project > Open Project" and point to file dialog to the demo archives hardware project dicsk:\Path_to_the_hardware_project_inside_the_archive\ , double left mouse click onto the project file "Smartberry_Webserver.prjx" to open it.
...
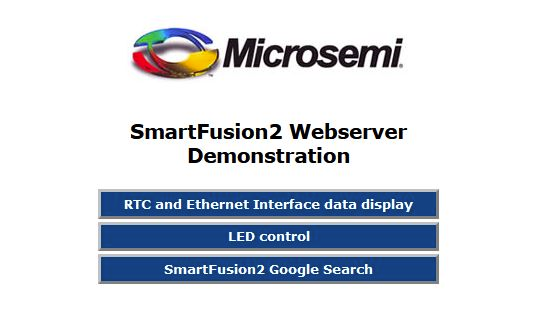
Open a new tab in a web browser and enter the IP Adress from the comport terminal.
Design Flow
| Page properties | ||||
|---|---|---|---|---|
| ||||
Notes :
|
| Note |
|---|
Reference Design is available with and without prebuilt files. It's recommended to use TE prebuilt files for first lunch. |
Trenz Electronic provides a tcl based built environment based on Xilinx Design Flow.
See also:
Xilinx Development Tools#XilinxSoftware-BasicUserGuidesVivado Projects - TE Reference DesignProject Delivery.
The Trenz Electronic FPGA Reference Designs are TCL-script based project. Command files for execution will be generated with "_create_win_setup.cmd" on Windows OS and "_create_linux_setup.sh" on Linux OS.
TE Scripts are only needed to generate the vivado project, all other additional steps are optional and can also executed by Xilinx Vivado/SDK GUI. For currently Scripts limitations on Win and Linux OS see: Project Delivery Currently limitations of functionality
_create_win_setup.cmd/_create_linux_setup.sh and follow instructions on shell: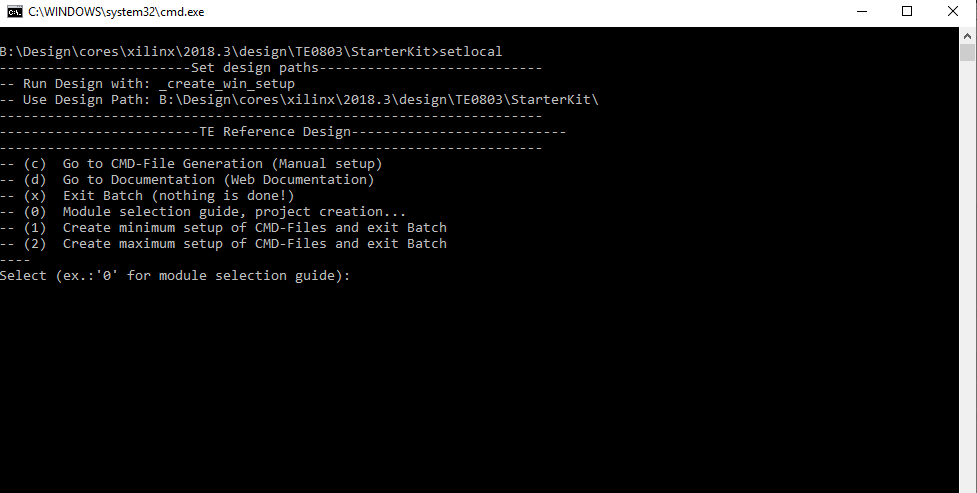
Press 0 and enter to start "Module Selection Guide"(optional Win OS) Generate Virtual Drive or use short directory for the reference design (for example x:\<design name>)Create Project (follow instruction of the product selection guide), settings file will be configured automatically during this process)(optional for manual changes) Select correct device and Xilinx install path on "design_basic_settings.cmd" and create Vivado project with "vivado_create_project_guimode.cmd"Note: Select correct one, see alsoTE Board Part FilesImportant: Use Board Part Files, which ends with *_tebf0808
Create XSA and export to prebuilt folderRun on Vivado TCL: TE::hw_build_design -export_prebuiltNote: Script generate design and export files into \prebuilt\hardware\<short dir>. Use GUI is the same, except file export to prebuilt folder
Create Linux (bl31.elf, uboot.elf , Image and system.dtb) with exported XSAXSA is exported to "prebuilt\hardware\<short name>"Note: HW Export from Vivado GUI create another path as default workspace.Create Linux images on VM, see PetaLinux KICKstartUse TE Template from /os/petalinux/Execute the script file for Debian/Ubuntu
Add Linux files (bl31.elf, uboot.elf , Image and system.dtb) to prebuilt folder"prebuilt\os\petalinux\<ddr size>" or "prebuilt\os\petalinux\<short name>"
Generate Programming Files with VitisRun on Vivado TCL: TE::sw_run_vitis -allNote: Scripts generate applications and bootable files, which are defined in "sw_lib\apps_list.csv"(alternative) Start SDK with Vivado GUI or start with TE Scripts on Vivado TCL: TE::sw_run_vitisNote: TCL scripts generate also platform project, this must be done manuelly in case GUI is used. See Vitis
Preparing SD card for SD Filesystem and hard disk for HD Filesystem → See Programming section
Launch
| Page properties | ||||
|---|---|---|---|---|
| ||||
Note:
|
Programming
...
System Design - Libero
| Page properties | ||||
|---|---|---|---|---|
| ||||
Note:
|
...
Overview
Content Tools