Page History
| Page properties | ||||||||||||||||||||||||||||||||||||||||||||||||||||||||
|---|---|---|---|---|---|---|---|---|---|---|---|---|---|---|---|---|---|---|---|---|---|---|---|---|---|---|---|---|---|---|---|---|---|---|---|---|---|---|---|---|---|---|---|---|---|---|---|---|---|---|---|---|---|---|---|---|
| ||||||||||||||||||||||||||||||||||||||||||||||||||||||||
Design Name is always "TE Series Name" + Design name, for example "TE0720 Test Board"
|
| Custom_table_size_100 |
|---|
Overview
| Scroll Ignore | ||||||||||||||
|---|---|---|---|---|---|---|---|---|---|---|---|---|---|---|
| ||||||||||||||
| Page properties | ||||
|---|---|---|---|---|
| ||||
Notes :
|
This page intends to give minimal documentation on how to set up the connection between the PC and the onBoard USB Controller of the TE0763 -01 mounted on a TE0303-01. It describes
- how to install the TRENZ driver on a win10 PC
- how to flash the EEPROM on the TE0763 with the new Firmware
- how to progam the QSPI Flash with the OpenFutNet Software
The documentation for older variants like TE0630 can still widely be used as a reference but the old software might not work like expected with TE0763.
| Note |
|---|
Note that the following linked software is adopted from the original TE USB Suite and is limited to 24 bit addressing! To write to the address space above 24 Bit, adjustments to driver/software and firmware have to be made. |
OpenFutNet and Firmware modified for TE0763: Download TE-USB-Suite-master
Driver: Download FX2-Driver for Windows
USB Chip Contoller
| Scroll Ignore | ||||||||||||||
|---|---|---|---|---|---|---|---|---|---|---|---|---|---|---|
| ||||||||||||||
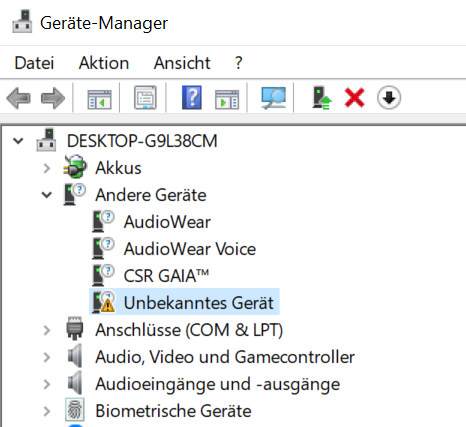
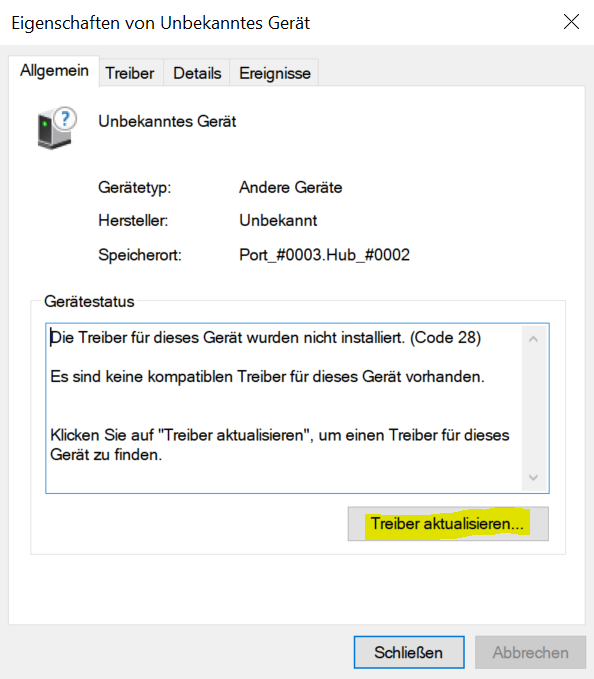
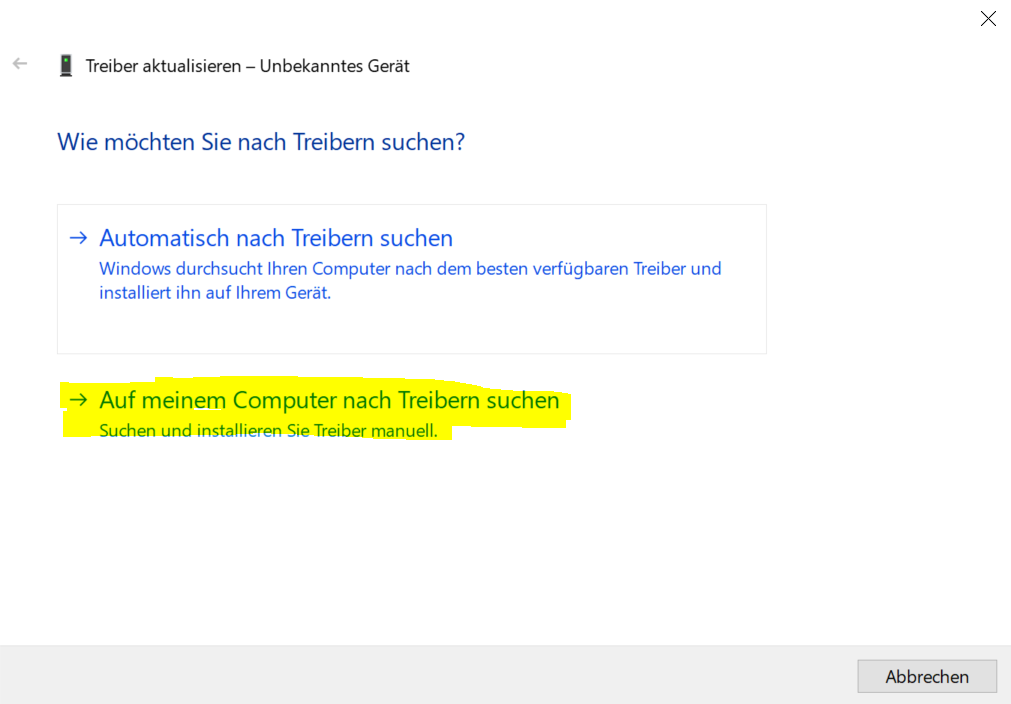
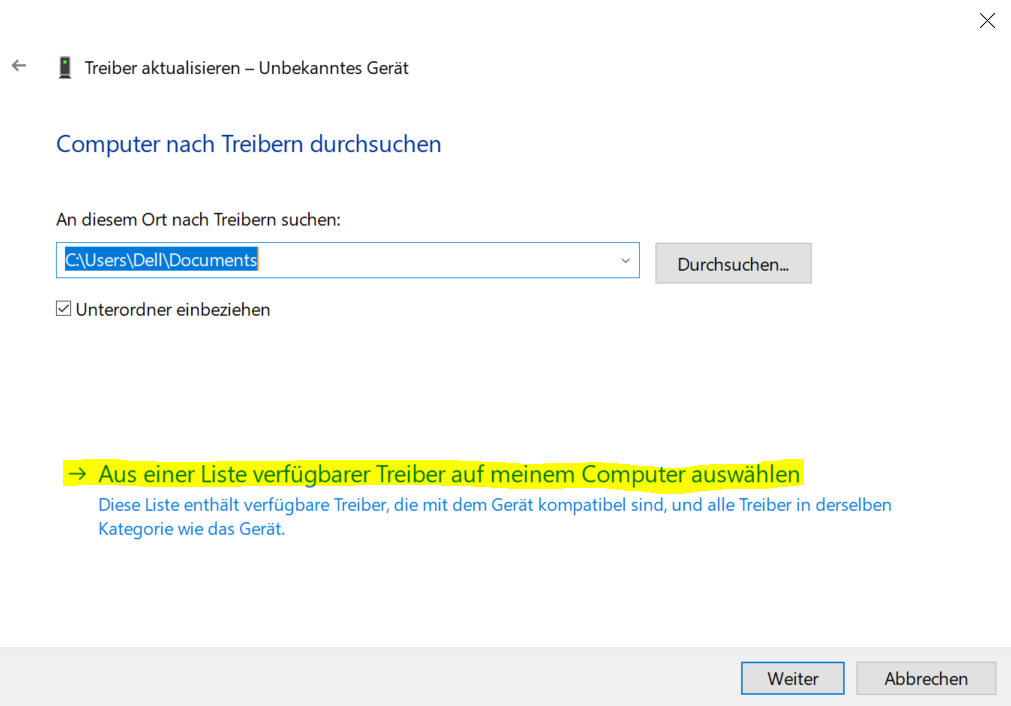
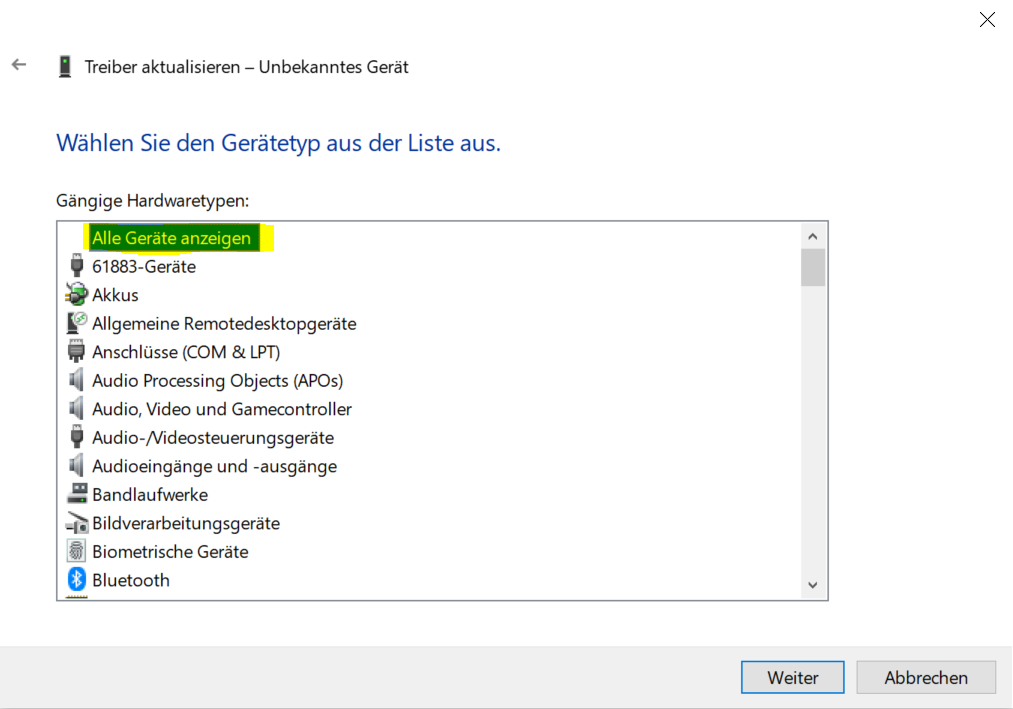
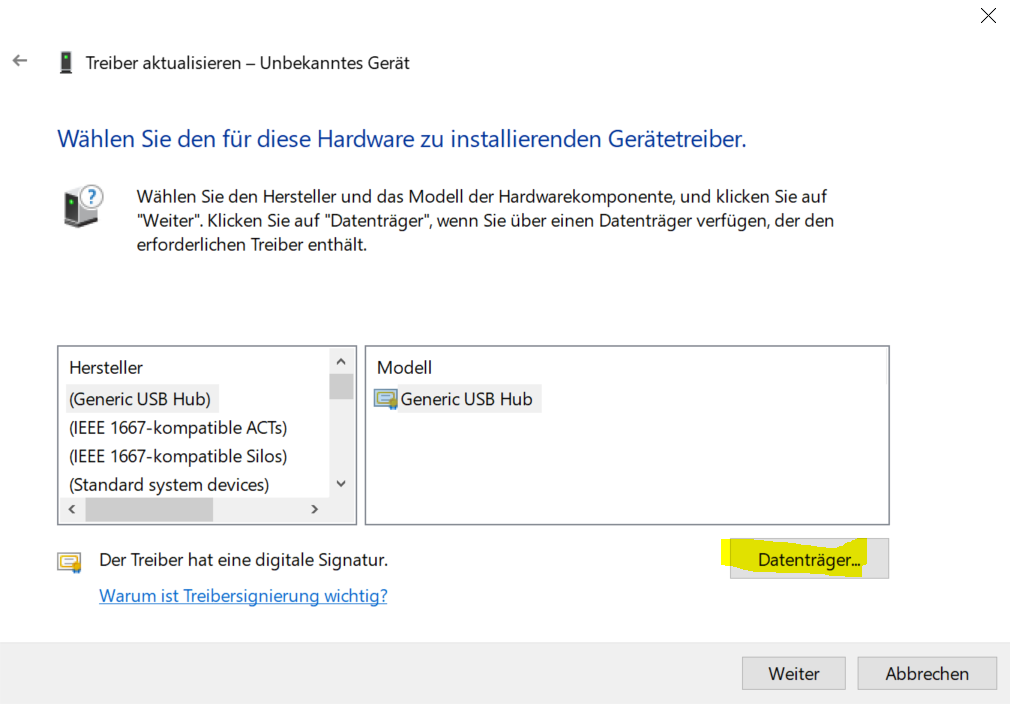
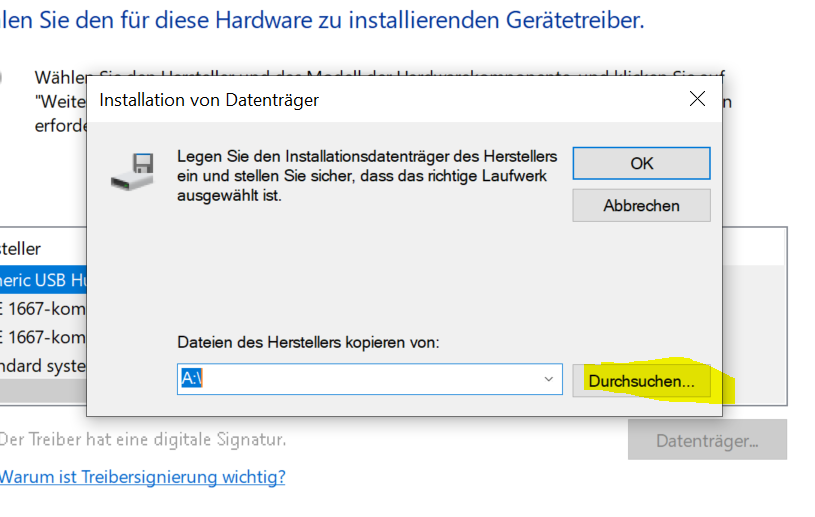
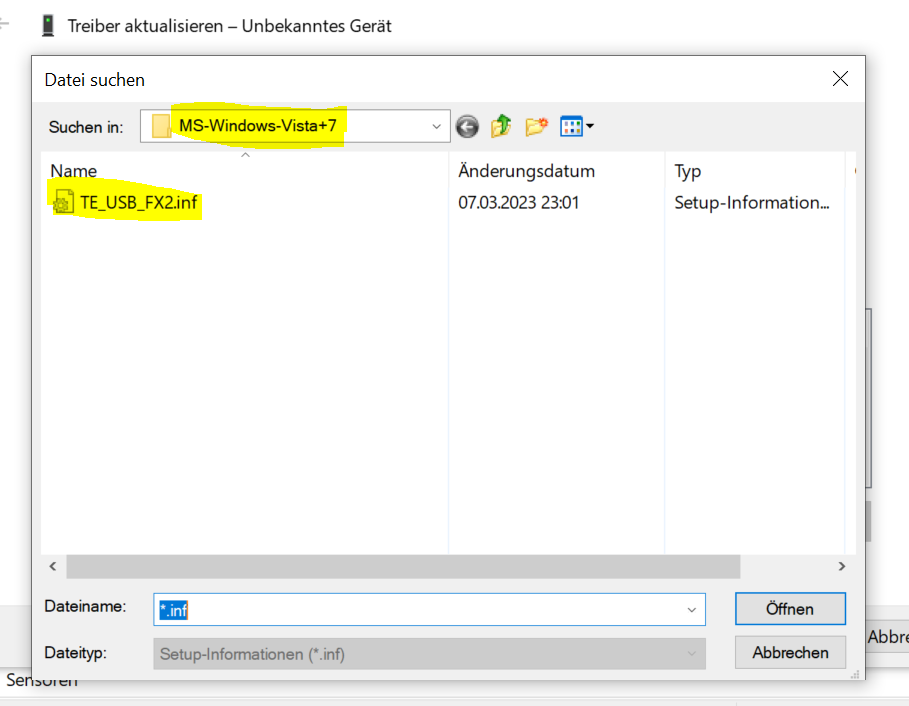
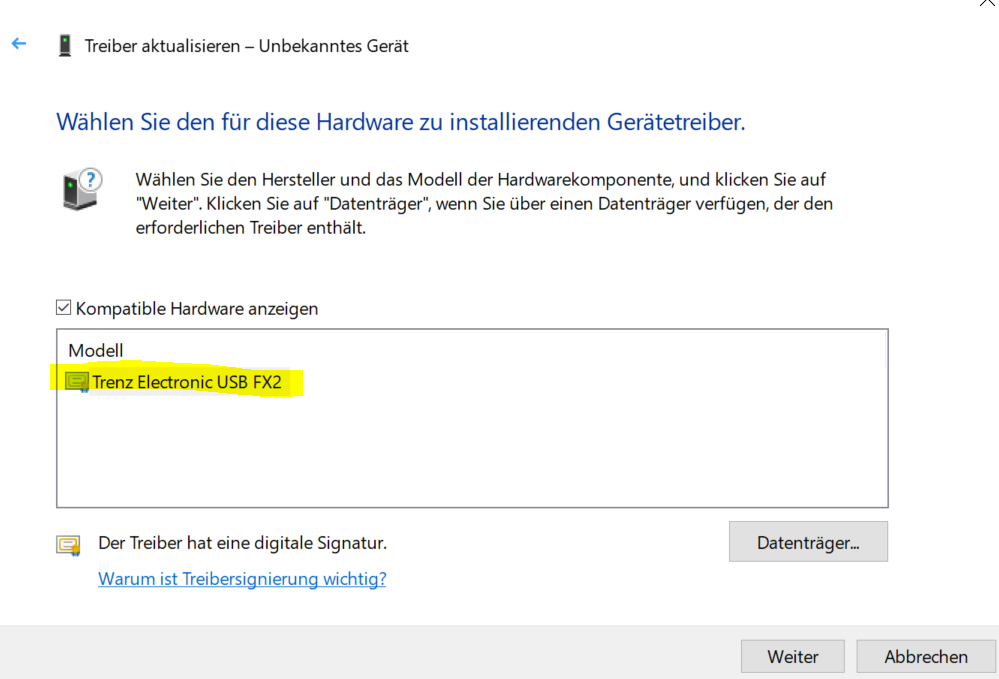
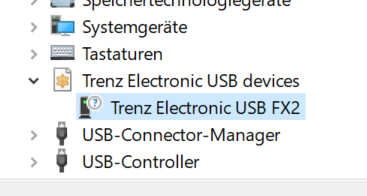
Install the FX2 Driver on Windows10
| Expand | ||
|---|---|---|
| ||
|

Flash the EEPROM with the modified Firmware
- Set the DIP-Switch S2 all OFFS2A to ON.
- Connect the Mini USB cable to the module
- Turn on the Board
- Open the Software "OpenFutNet.exe" from ...\TE-USB-Suite-master\TE_USB_FX2.gen_3\OpenFutNet\OpenFutNet\bin\Release
- You may see the default VID and PID different to 0x0BD0 and 0x0300
- Select the file "current_te.iic" and press program USB EEPROM
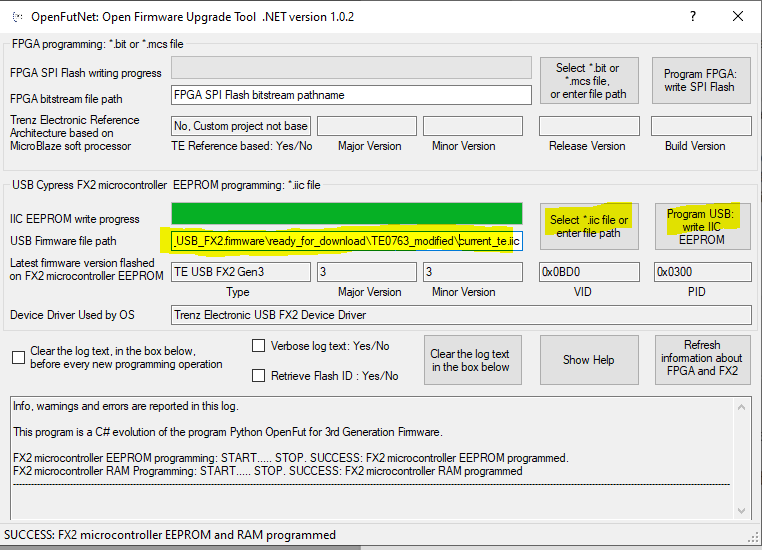
- When this step is successful, you should also see the right VID and PID after a power cycle
Program the QSPI Flash with OpenFutNet(Bitfile only!)
- Set the DIP-Switch S2A and S2B to ON.
- Turn on the Board
- Open the Software "OpenFutNet.exe" from ...\TE-USB-Suite-master\TE_USB_FX2.gen_3\OpenFutNet\OpenFutNet\bin\Release
- Select a Bitfile and press Program FPGA. This step takes a while! The progress bar might not be accurate! The Warning about "DONE Pin" can be ignored.
(info: the Bitfile has to be generated with SPI → X1 mode set in the constraint files)
- When successful, after a power cycle the new bitfile should be loaded into the FPGA.
App. A: Change History and Legal Notices
| Scroll Ignore | ||||||||||||||
|---|---|---|---|---|---|---|---|---|---|---|---|---|---|---|
| ||||||||||||||
Document Change History
To get content of older revision go to "Change History" of this page and select older document revision number.
| Page properties | ||||
|---|---|---|---|---|
| ||||
|
| Scroll Title | ||||||||||||||||||||||||||||||||||||||||||||||||||||||||||||||
|---|---|---|---|---|---|---|---|---|---|---|---|---|---|---|---|---|---|---|---|---|---|---|---|---|---|---|---|---|---|---|---|---|---|---|---|---|---|---|---|---|---|---|---|---|---|---|---|---|---|---|---|---|---|---|---|---|---|---|---|---|---|---|
| ||||||||||||||||||||||||||||||||||||||||||||||||||||||||||||||
|
Legal Notices
| Include Page | ||||
|---|---|---|---|---|
|
| Scroll Only | ||
|---|---|---|
|
| Scroll pdf ignore | ||||||
|---|---|---|---|---|---|---|
|
Overview
Content Tools