Page History
...
| Scroll Title | |||||||||||||||||||||||||||||||||||||||||||||||||||||
|---|---|---|---|---|---|---|---|---|---|---|---|---|---|---|---|---|---|---|---|---|---|---|---|---|---|---|---|---|---|---|---|---|---|---|---|---|---|---|---|---|---|---|---|---|---|---|---|---|---|---|---|---|---|
| |||||||||||||||||||||||||||||||||||||||||||||||||||||
|
...
For general structure and of the reference design, see Project Delivery - Xilinx AMD devices
Design Sources
| Scroll Title | ||||||||||||||||||||||||||||||
|---|---|---|---|---|---|---|---|---|---|---|---|---|---|---|---|---|---|---|---|---|---|---|---|---|---|---|---|---|---|---|
| ||||||||||||||||||||||||||||||
|
...
Trenz Electronic provides a tcl based built environment based on Xilinx Design Flow.
See also:
- Xilinx AMD Development ToolsTools#XilinxSoftware-BasicUserGuides
- Vivado Projects - TE Reference Design
- Project Delivery.
The Trenz Electronic FPGA Reference Designs are TCL-script based project. Command files for execution will be generated with "_create_win_setup.cmd" on Windows OS and "_create_linux_setup.sh" on Linux OS.
TE Scripts are only needed to generate the vivado project, all other additional steps are optional and can also executed by Xilinx Vivado/SDK GUI. For currently Scripts limitations on Win and Linux OS see: Project Delivery Currently limitations of functionality
- _create_win_setup.cmd/_create_linux_setup.sh and follow instructions on shell:
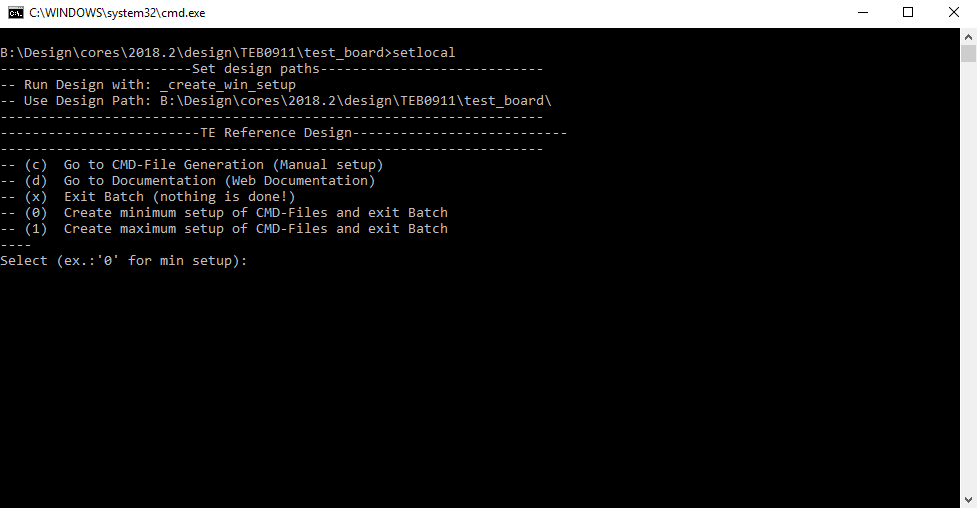
- Press 0 and enter to start "Module Selection Guide"
- (optional Win OS) Generate Virtual Drive or use short directory for the reference design (for example x:\<design name>)
- Create Project (follow instruction of the product selection guide), settings file will be configured automatically during this process
- (optional for manual changes) Select correct device and Xilinx install path on "design_basic_settings.cmd" and create Vivado project with "vivado_create_project_guimode.cmd"
Note: Select correct one, see alsoTE Board Part Files
- (optional for manual changes) Select correct device and Xilinx install path on "design_basic_settings.cmd" and create Vivado project with "vivado_create_project_guimode.cmd"
- Create HDF and export to prebuilt folder
- Run on Vivado TCL: TE::hw_build_design -export_prebuilt
Note: Script generate design and export files into \prebuilt\hardware\<short dir>. Use GUI is the same, except file export to prebuilt folder
- Run on Vivado TCL: TE::hw_build_design -export_prebuilt
- Create Linux (uboot.elf and image.ub) with exported XSA
- XSAis exported to "prebuilt\hardware\<short name>"
Note: HW Export from Vivado GUI create another path as default workspace. - Create Linux images on VM, see PetaLinux KICKstart
- Use TE Template from /os/petalinux
- XSAis exported to "prebuilt\hardware\<short name>"
- Add Linux files (uboot.elf and image.ub) to prebuilt folder
- "prebuilt\os\petalinux\<ddr size>" or "prebuilt\os\petalinux\<short name>"
- Generate Programming Files with Vitis
- Run on Vivado TCL: TE::sw_run_vitis -all
Note: Scripts generate applications and bootable files, which are defined in "sw_lib\apps_list.csv" - (alternative) Start SDK with Vivado GUI or start with TE Scripts on Vivado TCL: TE::sw_run_vitis
Note: TCL scripts generate also platform project, this must be done manuelly in case GUI is used. See Vitis
- Run on Vivado TCL: TE::sw_run_vitis -all
...
Xilinx documentation for programming and debugging: Vivado/SDK/SDSoC-Xilinx Software Programming and Debugging
Get prebuilt boot binaries
...
| Scroll Title | ||||||||||||||||||||||||||||||||||||||||||||||||
|---|---|---|---|---|---|---|---|---|---|---|---|---|---|---|---|---|---|---|---|---|---|---|---|---|---|---|---|---|---|---|---|---|---|---|---|---|---|---|---|---|---|---|---|---|---|---|---|---|
| ||||||||||||||||||||||||||||||||||||||||||||||||
|
...
Constrains
...
Basic module constrains
...
| Code Block | ||||
|---|---|---|---|---|
|
Constrains
Basic module constrains
| Code Block | ||||
|---|---|---|---|---|
| ||||
set_property BITSTREAM.GENERAL.COMPRESS TRUE [current_design] set_property BITSTREAM.CONFIG.UNUSEDPIN PULLNONE [current_design] |
...
| Code Block | ||
|---|---|---|
| ||
/include/ "system-conf.dtsi"
/ {
  chosen {
    xlnx,eeprom = &eeprom;
  };
};

/* USB  */

&dwc3_0 {
    status = "okay";
    dr_mode = "host";
    snps,usb3_lpm_capable;
    snps,dis_u3_susphy_quirk;
    snps,dis_u2_susphy_quirk;
    phy-names = "usb2-phy","usb3-phy";
    phys = <&lane1 4 0 21 100000000>;
    maximum-speed = "super-speed";
};


/* QSPI */

&qspi {
    #address-cells = <1>;
    #size-cells = <0>;
    status = "okay";
    flash0: flash@0 {
        compatible = "jedec,spi-nor";
        reg = <0x0>;
        #address-cells = <1>;
        #size-cells = <1>;
    };
};


/* ETH */

&gem3 {
        phy-handle = <&phy0>;
        phy0: phy0@1 {
                device_type = "ethernet-phy";
                reg = <1>;
        };
};


/* SD1 */

&sdhci1 {
    // disable-wp;
    no-1-8-v;

};


&i2c0 {
    i2cswitch@76 { // I2C Switch U13
        compatible = "nxp,pca9548";
        #address-cells = <1>;
        #size-cells = <0>;
        reg = <0x76>;
        i2c-mux-idle-disconnect;

        i2c@2 { // FMCD (/dev/i2c-3)
            #address-cells = <1>;
            #size-cells = <0>;
            reg = <2>;
        };
        i2c@3 { // FMCE (/dev/i2c-4)
            #address-cells = <1>;
            #size-cells = <0>;
            reg = <3>;
        };
        i2c@4 { // FMCB (/dev/i2c-5)
            #address-cells = <1>;
            #size-cells = <0>;
            reg = <4>;
        };
        i2c@5 { // FMCC (/dev/i2c-6)
            #address-cells = <1>;
            #size-cells = <0>;
            reg = <5>;
        };
        i2c@6 { // PLL (/dev/i2c-7)
            #address-cells = <1>;
            #size-cells = <0>;
            reg = <6>;

            si570_2: clock-generator3@5d {
                #clock-cells = <0>;
                compatible = "silabs,si570";
                reg = <0x5d>;
                temperature-stability = <50>;
                factory-fout = <156250000>;
                clock-frequency = <78800000>;

            };
        };
    };
    i2cswitch@77 { // I2C Switch U37
        compatible = "nxp,pca9548";
        #address-cells = <1>;
        #size-cells = <0>;
        reg = <0x77>;
        i2c-mux-idle-disconnect;

        i2c@0 { // SFP2 (/dev/i2c-9)
            #address-cells = <1>;
            #size-cells = <0>;
            reg = <0>;
        };
        i2c@1 { // FMCA (/dev/i2c-10)
            #address-cells = <1>;
            #size-cells = <0>;
            reg = <1>;
        };
        i2c@2 { // FMCF (/dev/i2c-11)
            #address-cells = <1>;
            #size-cells = <0>;
            reg = <2>;
        };
        i2c@3 { // SFP0 (/dev/i2c-12)
            #address-cells = <1>;
            #size-cells = <0>;
            reg = <3>;
        };
        i2c@4 { // SFP1 (/dev/i2c-13)
            #address-cells = <1>;
            #size-cells = <0>;
            reg = <4>;
        };
        i2c@5 { // MEM (/dev/i2c-14)
            // Low frequency to work with CPLD
            clock-frequency = <100000>;
            #address-cells = <1>;
            #size-cells = <0>;
            reg = <5>;
            eeprom: eeprom@54 {
                compatible = "atmel,24c08";
                reg = <0x54>;
              };
        };
        i2c@6 { // DDR4 (/dev/i2c-15)
            #address-cells = <1>;
            #size-cells = <0>;
            reg = <6>;
        };
        i2c@7 { // USBH (/dev/i2c-16)
            #address-cells = <1>;
            #size-cells = <0>;
            reg = <7>;
        };

    };
};
|
...
- # CONFIG_CPU_IDLE is not set (only needed to fix JTAG Debug issue)
- # CONFIG_CPU_FREQ is not set (only needed to fix JTAG Debug issue)
- CONFIG_EDAC_CORTEX_ARM64=y (only needed to fix JTAG Debug issue)
Rootfs
Start with petalinux-config -c rootfs
Changes:
- CONFIG_NVME_CORE=y
- CONFIG_BLK_DEV_NVME=y
- # CONFIG_NVME_MULTIPATH is not set
- CONFIG_NVME_TARGET=y
- # CONFIG_NVME_TARGET_LOOP is not set
- # CONFIG_NVME_TARGET_FC is not set
- CONFIG_NVM=y
- CONFIG_NVM_PBLK=y
- CONFIG_NVM_PBLK_DEBUG=y
Rootfs
Start with petalinux-config -c rootfs
Changes:
- CONFIG_i2c-tools=y
- CONFIG_busybox-httpd=y (for web server app)
- CONFIG_packagegroup-petalinux-utils(util-linux,cpufrequtils,bridge-utils,mtd-utils,usbutils,pciutils,canutils,i2c-tools,smartmontools,e2fsprogs)i2c-tools
Applications
See: \os\petalinux\project-spec\meta-user\recipes-apps\
...
| Scroll Title | ||||||||||||||||||||||||||||||||||||||||||||||||||||||||||||||||||||||||||||||||||||||||||||
|---|---|---|---|---|---|---|---|---|---|---|---|---|---|---|---|---|---|---|---|---|---|---|---|---|---|---|---|---|---|---|---|---|---|---|---|---|---|---|---|---|---|---|---|---|---|---|---|---|---|---|---|---|---|---|---|---|---|---|---|---|---|---|---|---|---|---|---|---|---|---|---|---|---|---|---|---|---|---|---|---|---|---|---|---|---|---|---|---|---|---|---|---|
| ||||||||||||||||||||||||||||||||||||||||||||||||||||||||||||||||||||||||||||||||||||||||||||
|
...
Overview
Content Tools