...
- you should select "rs232" if you desire to use a real UART ( and not a simulated UART though JTAG connection) (LINK ????????);
- you should select "debug_module" if you desire that the XMD_UART works as local UART through the JTAG connection.
| Tip |
|---|
| Demo program (running on MicroBlaze) will work even in case the UART port is left unconnected: it is not necessary to use a USB/Uart converter or Uart port on a PC, if you are using XMD UART HDL block |
Change rs232 to debug_module
...
| BSP settings: rs232 or debug_module |
|
 Image Added Image Added |
After this, you should click drivers to verify that all Microblaze components are supported by the driver in the repository "C:\XilinxProject\TE-EDK-IP"; click "OK" and the pop-up should dissapear.
ADD IMMAGE HERE ?????
In particular you should also verify that "xmdstub_peripheral" is assigned to none if you desire to use debug_module instead of rs232.
| Scroll Title |
|---|
| title | xmdstub_peripheral assigned to none |
|---|
|
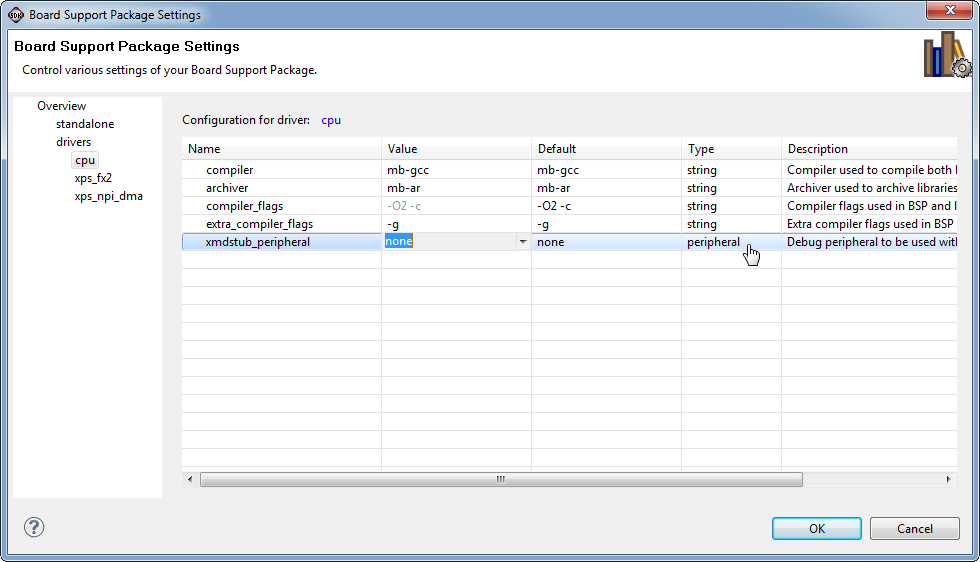 Image Added Image Added |
After this, you have verified that all Microblaze components are supported by a driver, right click the "standalone_bsp_0" folder in "Project Explorer".
Now, you should generate a new link script.
STDIO connection of RUN and DEBUG: JTAG UART
...