Page History
...
- Step 1 - Installation of Anaconda respectively jupyter
- Step 2 - Installation of "pyserial"
- Step 3 - Making the demos accessible for Jupyter
- Step 4 - Starting Jupyter
- Step 5 - Opening a demo
- Step 6 - Alter the comport to yours
- Step 7 - Running the demo
- Annotations
Installation of Anaconda respectively Jupyter
The simplest way to execute the demos in Jupyter is accomplished through the installation of Anaconda.
This will install more than is needed but nearly all requirements in one step.
...
If the installer offers you the installation of optional applications, just skip those, they are
not needed to run the demos or edit their code.
Installation of Pyserial
At least with Anaconda installation on Windows, pyserial (python serial port support library) is not
included and has to be installed. This can be done from the Anaconda command prompt. To open the
Anaconda command prompt, just press the windows key, type Anaconda prompt and open it. Enter
...
into the command prompt an press enter. This starts the search for software dependencies of pyserial,
you are asked to confirm the installation, to proceed press Y.
The console shows a message when pyserial is installed and thereafter the console is no longer needed
and can be closed.
Making the demos accessible for Jupyter
The demo is available through a link in the parent page. The download is a folder, containing all the necessary
files and documents. The download folder is compressed into a zip archive and need to be extracted, to be accessible for
Jupyter.
Jupyter has access to the user folder, so a convenient way is to copy the extracted demo folder
(TEI001X-0x-08-C8A_Jupyter-ADC-demo_Vx.y_quartusxy.z_...) into your users folder, for example:
C:\Users\Username\download-folder
Starting Jupyter
To open Jupyter, press the windows key and type Jupyter, this presents "Jupyter Notebook (AnacondaX)" to you,
from which one can start Jupyter.
...
So opening it starts the server, which opens a console displaying status messages of the server.
The console must be open all the time, you want Jupyter to run. You can minimize it.

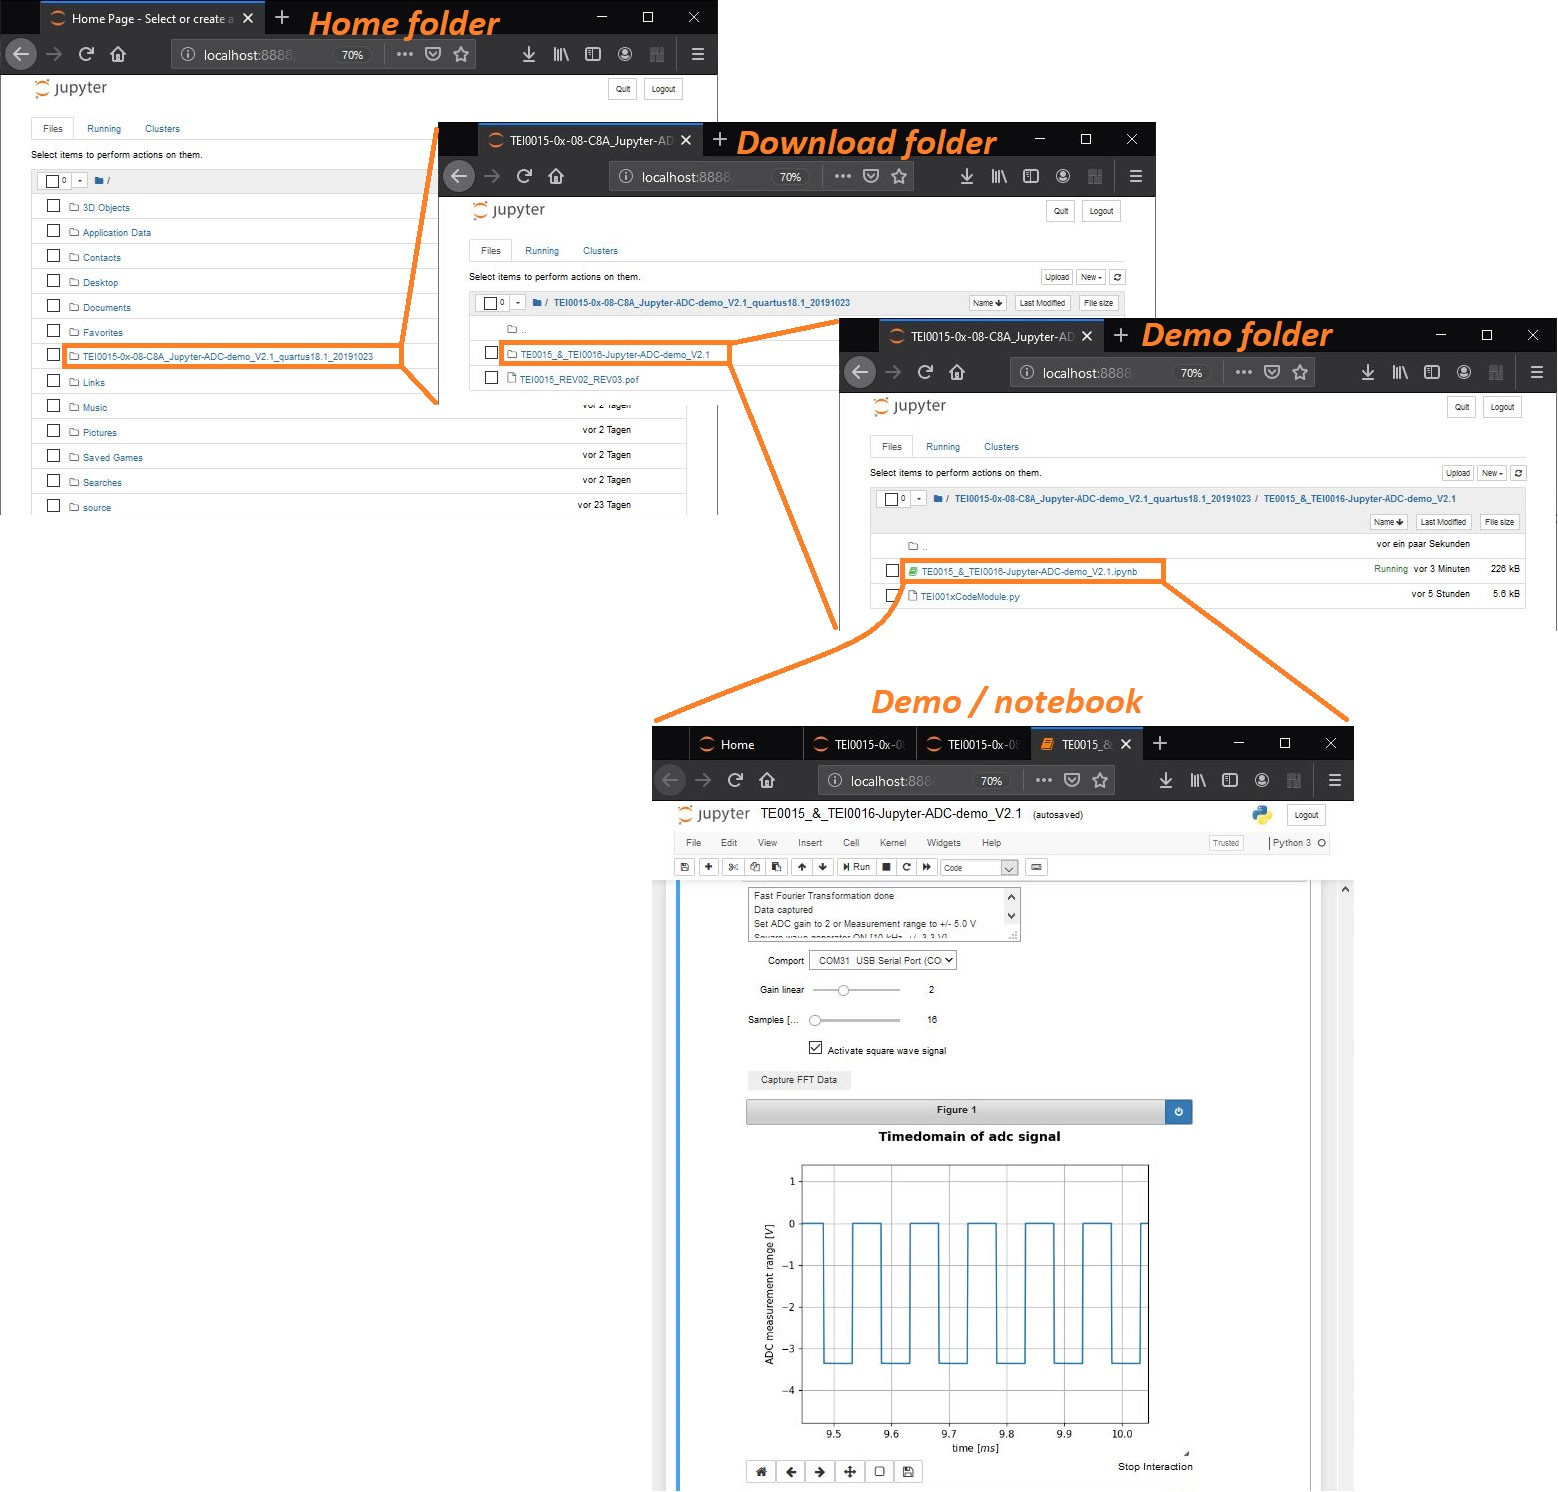
Opening a demo
Generally, the Jupyter tab inside your browser is in itself a file browser. Jupyter has access only to
your user or home folder which it displays after the program start. To start a notebook, one has to
navigate to the folder containing the notebook file.
...
In the picture below these steps are shown.
Alter the comport to yours
Every demo communicates with the module by a serial communication port. This port has been assigned
a number during the driver installation. In our case it is COM5.
...
Variant 2:
Some demos contain a graphical user interface. The available comports will be presented
automatically and can be selected trough the GUI.
As an option, a default comport can be set at the beginning of the notebook.
Running the demo
A notebook consists of cells, in which its content resides. Demos so far only contain one cell, to run the demo,
the PC's focus must be upon the cell, left clicking into the cells source code focuses this cell.
...
Often demos gather data from the module and display them in graph plots.
All output of a notebooks cell is displayed below the cell.
Annotations
- The demos are linked to Jupyter through the import and use of only the following modules:
IPython - Interacting from within the Notebook with its output / plots
ipywidgets - Interactive Widgets/GUI elements for the Jupyter Notebook - Show line numbers inside a notebook: View → Toggle Line Numbers
Autocomplete is available when pressing the Tab key
- Variables of a notebook cell are not encapsulated from other cells inside the same notebook
Overview
Content Tools