Page History
| Table of Contents |
|---|
Driver Installation
The communication with a module supposes a comport, and therefore a driver is required.
When connecting the module to your computer, windows starts the Automatic driver Installation,
but often the automatic driver installation fails and the driver needs to be installed manually.
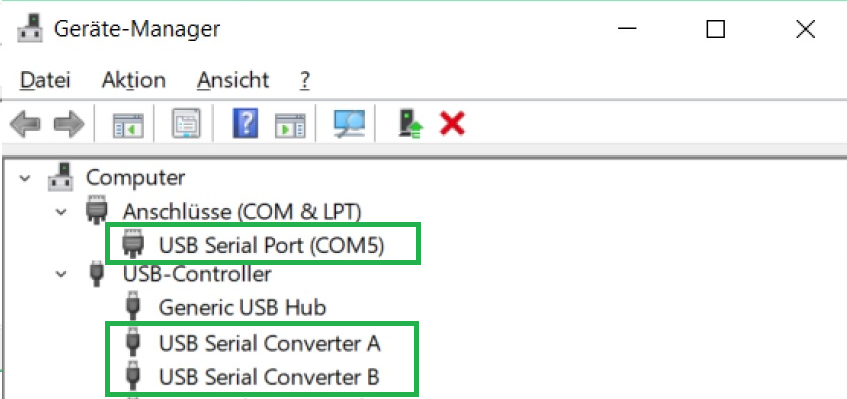
So it is best practice to connect the module, give the operation system some time, and check
afterwards in the device manager for the appearance of a "comport" and two devices labelled
"USB Serial Convert A and B".
The device manager can be opened either via a right mouse click onto the windows symbol
or by pressing the windows button and typing device manager.
When instead two devices labelled "Arrow USB Blaster" are listed under "other devices", the manual
approach has to be taken.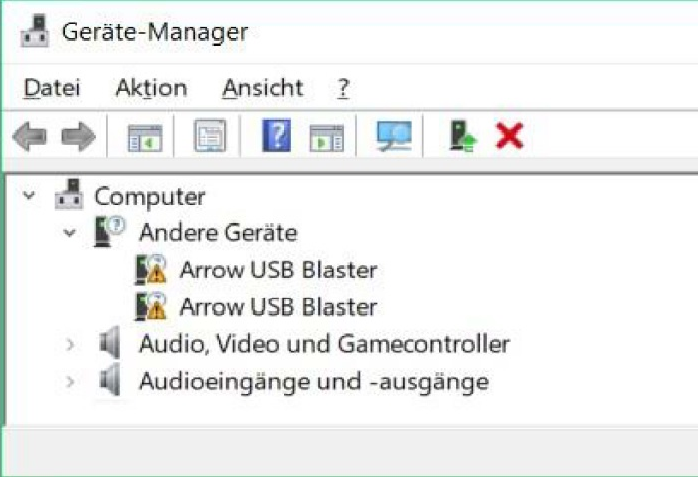
Through a right mouse click on each device, a context menu opens. Chose "Update driver" afterwords chose
"Search automatically for updated driver software", this proper driver installation changes the devices names
into USB Serial Converter A & B, in addition, also the comport is installed.
Check its number (“COMx” ) and memorize it for the later use within the demos.
In dependency to the modules firmware, the driver installation can lead to the appearance of two comports,
in this instance, the higher numbered comport is of importance.
Link for Linux user on how to install the driver "Arrow USB programmer"
Firmware Update
The module is shipped with the Firmware suitable for all Reference designs.
This guide is for restoring the firmware to factory condition, in case it has been altered.
For restoring For updating the firmware of the module, one needs:
...
Quartus prime and Arrow-USB-Blaster need to be installed prior to updating the firmware.
In addition, the compressed folder needs to be extracted.
In the windows start menu search for Intel FPGA 18.1. ... Lite Edition and open programmer.
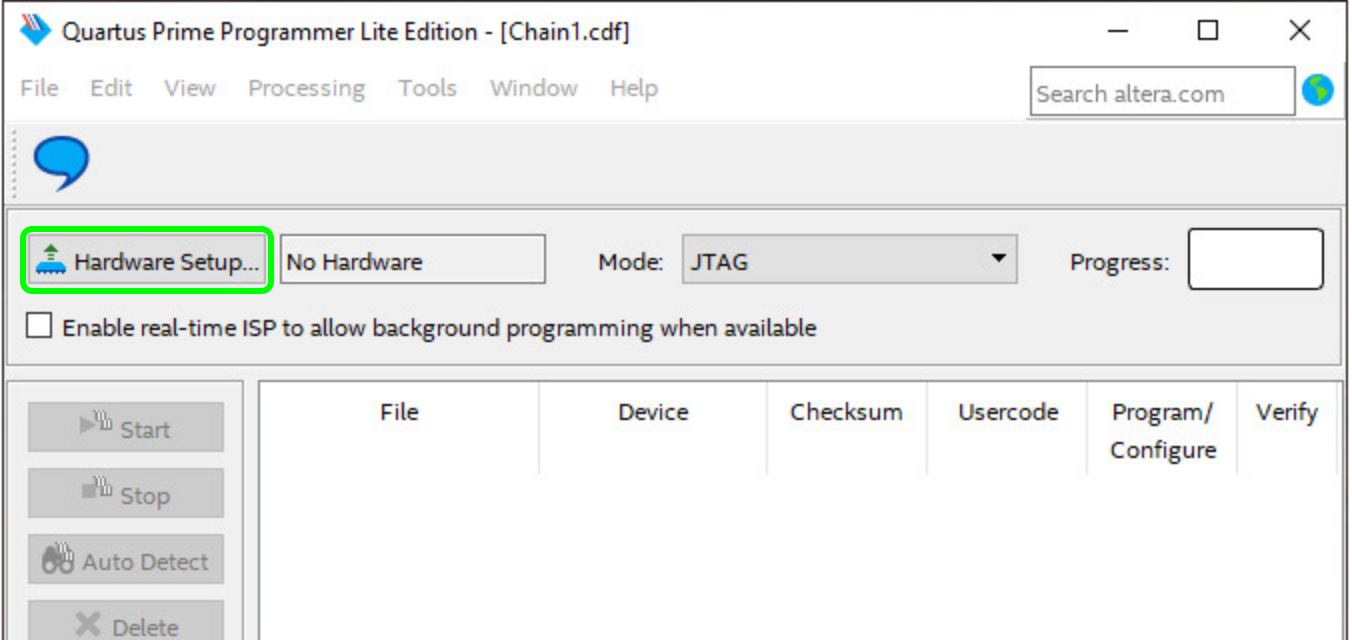
In its window To update the firmware, open Quartus prime and press "Hardware Setup..." . A which leads to an other new window opens.
| Scroll Title | ||||||||||||||||||||||||||||||||
|---|---|---|---|---|---|---|---|---|---|---|---|---|---|---|---|---|---|---|---|---|---|---|---|---|---|---|---|---|---|---|---|---|
| ||||||||||||||||||||||||||||||||
|
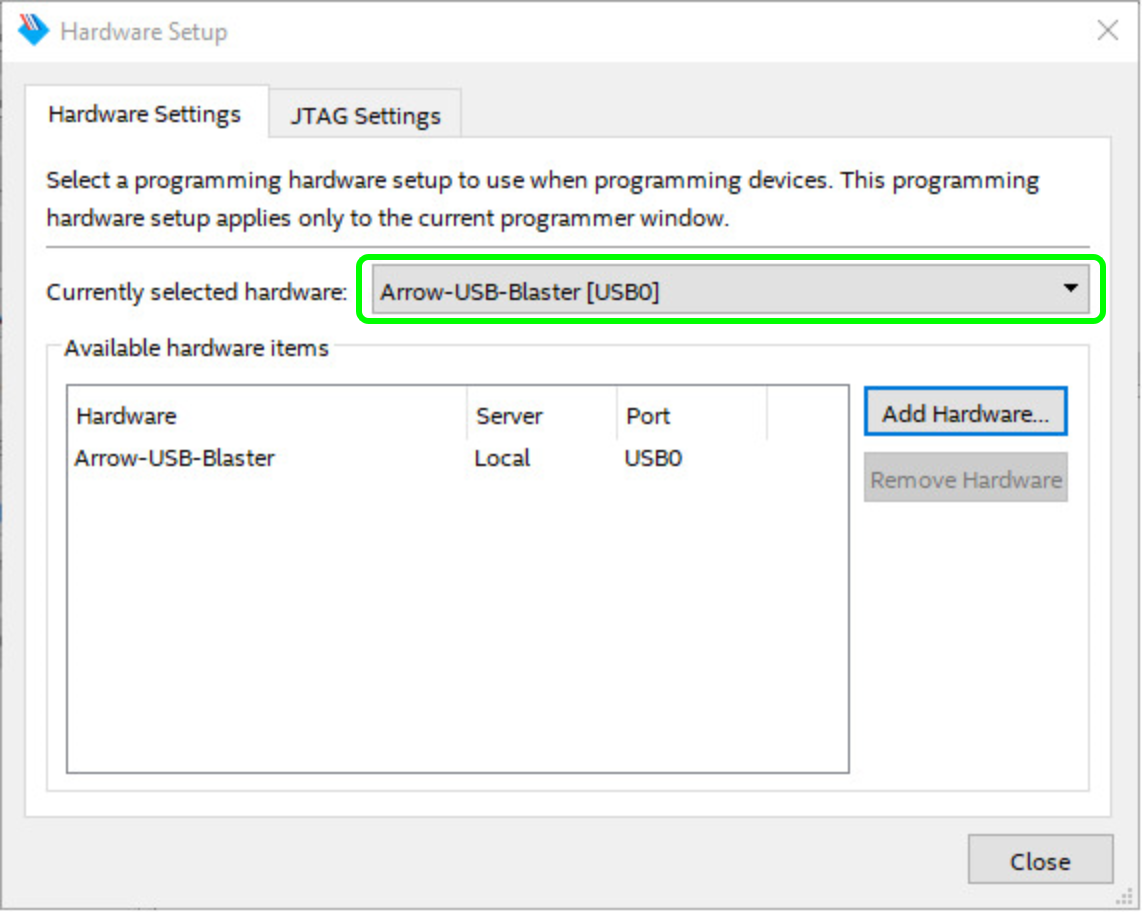
In it press right next to "Currently selected hardware" and select "Arrow-USB-Blaster [USBX]",
whereby the "X" in [USBX] is a placeholder.
| Scroll Title | ||||||||||||||||||||||||||||||||
|---|---|---|---|---|---|---|---|---|---|---|---|---|---|---|---|---|---|---|---|---|---|---|---|---|---|---|---|---|---|---|---|---|
| ||||||||||||||||||||||||||||||||
|
Then, press "Close" and return to the previous window.
...
| anchor | Figure_OV_BD |
|---|---|
| title | TExxxx block diagram |
...
...
| Scroll Only |
|---|
Now the hardware is selected and through pressing "Add File" the downloaded *.pof firmware file can be selected.
The window layout changes slightly.
| Scroll Title | ||
|---|---|---|
|
...
|
...
|
...
|
...
|
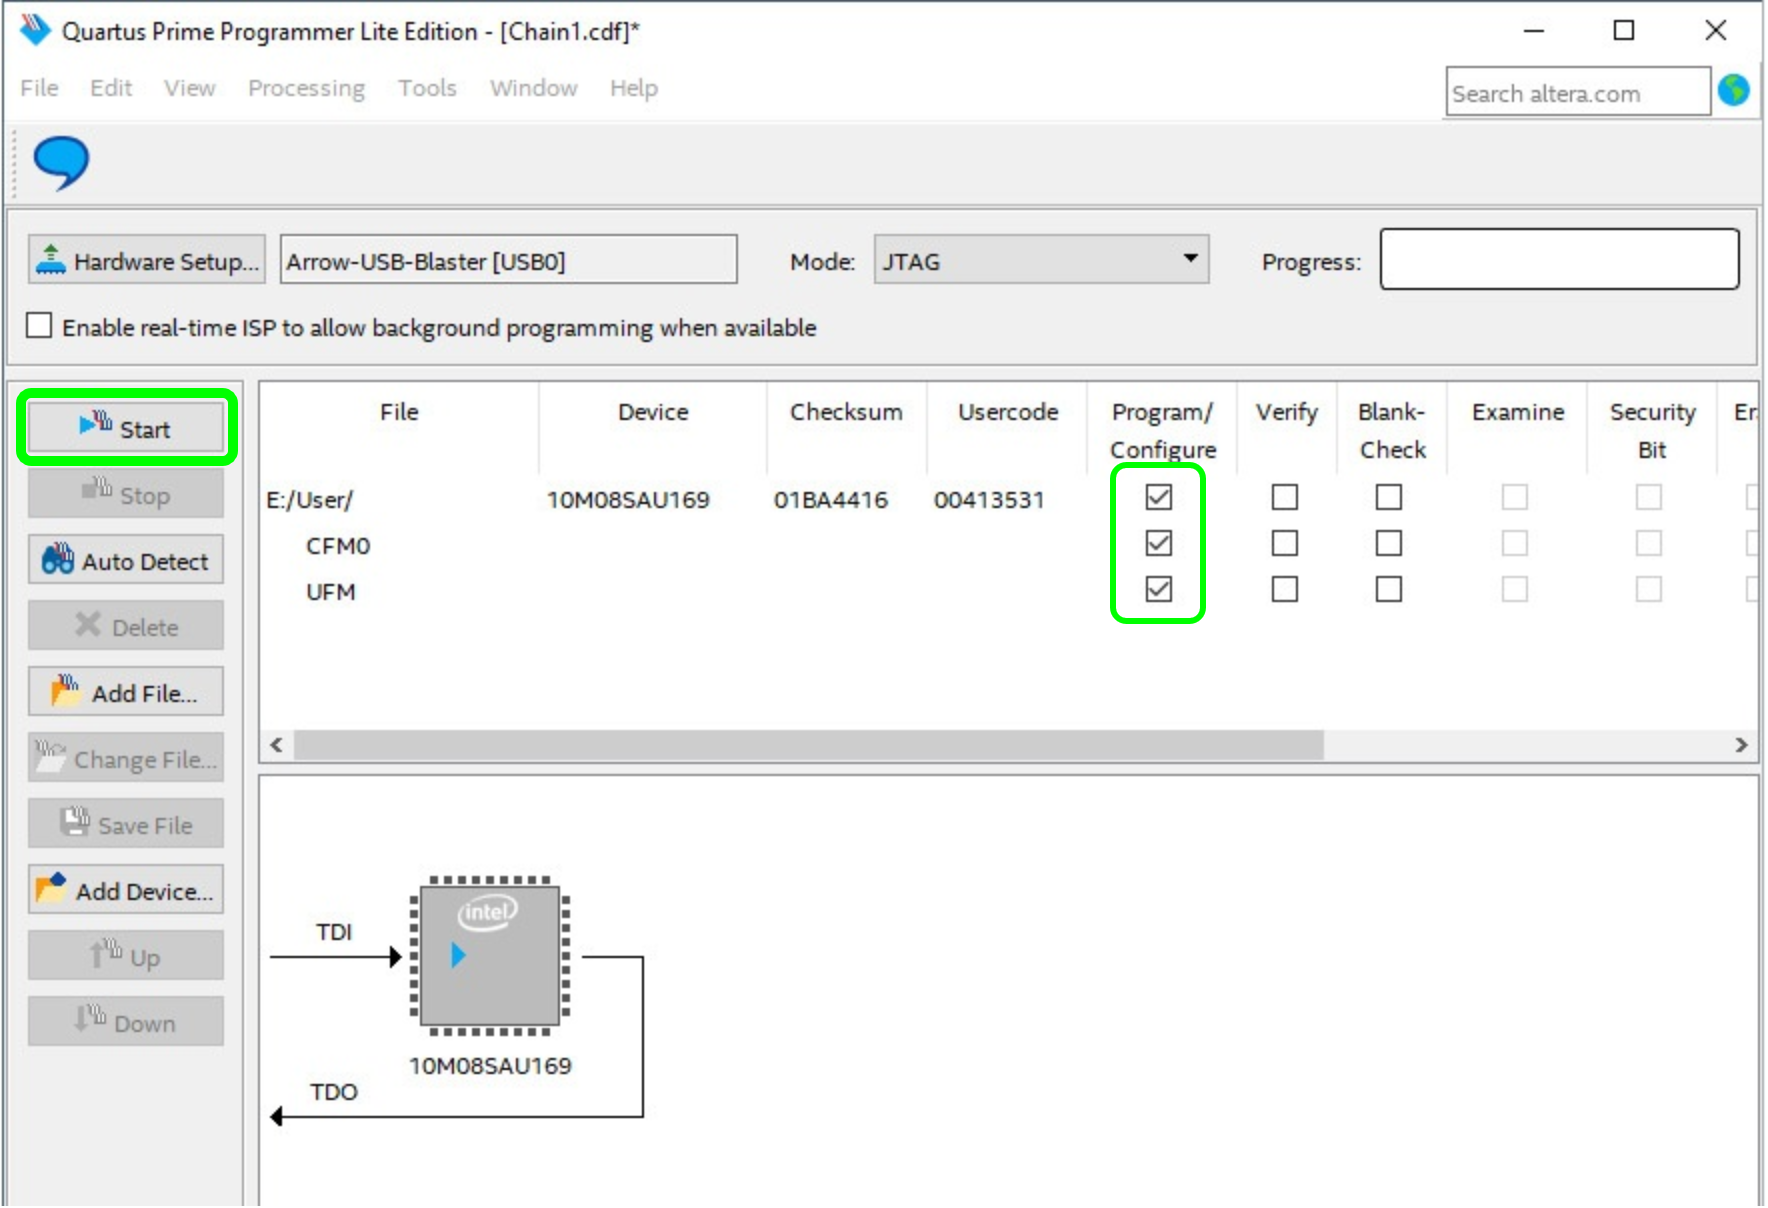
Mark the "Program/Configure" box for the selected file. The programming of the FPGA is executed, when you press the button "Start".
When the programming finishes, the Quartus Prime Programmer can be closed.
...
Overview
Content Tools