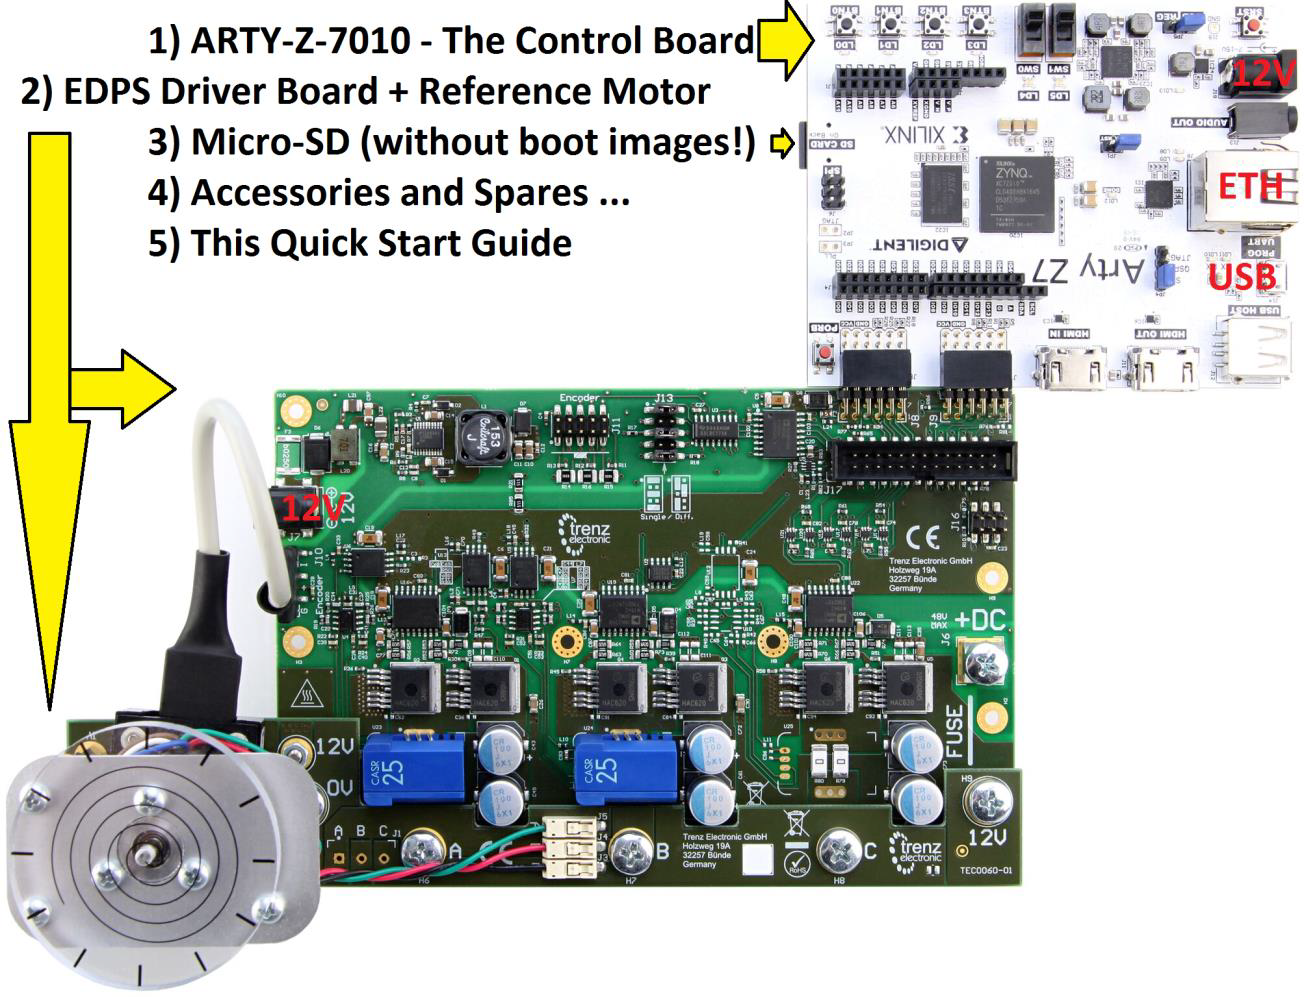
- Insert micro-SD card with downloaded boot images into SD card slot of ARTY-Z.
- Connect Motor/Driver Board to ARTY-Z so that both PMoD connectors are aligned.
- Attach plastic DEMO load to the motor shaft (optional step).
- Connect a micro-USB Cable (not supplied) to ARTY-Z and to a PC with serial terminal program.
- Connect Ethernet cable (not supplied) to ARTY-Z and wired network with DHCP server.
- Connect power supplies to the ARTY-Z and Driver Board and apply power.
- ARTY-Z will log IP address to serial console, point a web browser to this IP Address.
- It is also possible to view/change the IP Address from console (login/pass are root/root).
- EDDP GUI appears, click "Motor" to start the Motor, it should start spinning.
All jumpers are in default positions: ARTY-Z JP5-REG, JP4-SD and Driver board J13-Single (3 jumpers).
What’s next?
Full Documentation with Design Examples and resource links are available from: Trenz Electronic EDDP Web Hub http://trenz.org/EDDP
Overview
Content Tools