When Xilinx SDK open, you should:
1) Set the repositories for device driver of custom block used in SDK Microblaze project
- click Xilinx "Xilinx Tools" and then "Repositories"

XilinxSDKProjectRepositories
- after this a pop-up "Preferences" will appears

Add Reference Repositories for custom driver of custom block/device
- click "New..." button of "Local Repositories (available to the current workspace)"
- select C:\XilinxProject\TE-EDK-IP

Add reference with double indirection (as required by Xilinx SDK)
- click "Apply"
- you should click "OK"
- after this you must wait until the building procedure ended.
2) Create an Hardware Platform Specification Project
- You should click "File" >"New" > "Project"

Xilinx SDK New Project
- a pop up "New Project" will appears
- click"Xilinx">"Hardware Platform Specification", then next

Xilinx SDK new HW Platform Specification
- a new pop up "New Hardware Project" will appear

Xilinx SDK HW Project New Wizard 1
- under "Target Hardware Specification" click "Browse..." button
- a new pop up "Hardware Specification File" will appear

- select "system.xml", "C:\XilinxProject\reference-TE0300\SDK\SDK_Export\hw\system.xml"
- after the selection a new hardware specification (with name "reference-TE0300_hw_platform") appears in the Procject Explorer of SDK.

ReferenceHWplatform
3) Create a Board Support Package Project
- You should click "File" >"New" > "Project"
- a pop up "New Project" will appears
- click"Xilinx">"Board Support Package", then next
- a new pop up "New Board Support Package Project" will appear;
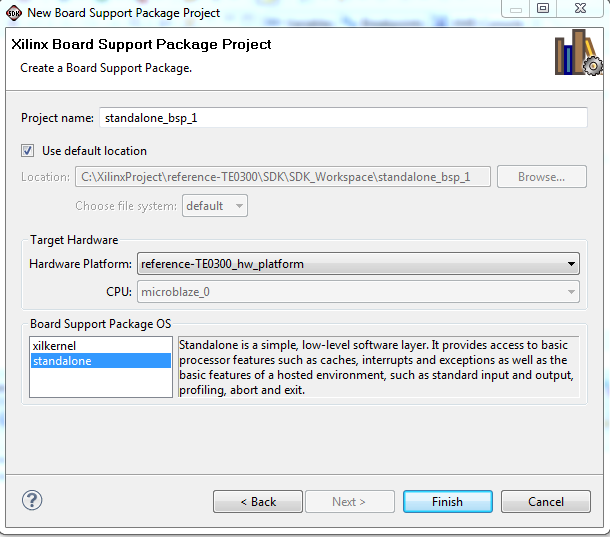
New Xilinx Board Support Packages
- select "standalone" for "Board Support Package OS" and "standalone_bsp_0" for the "Project name"
- a new pop-up will appear "Board Support Package Settings"
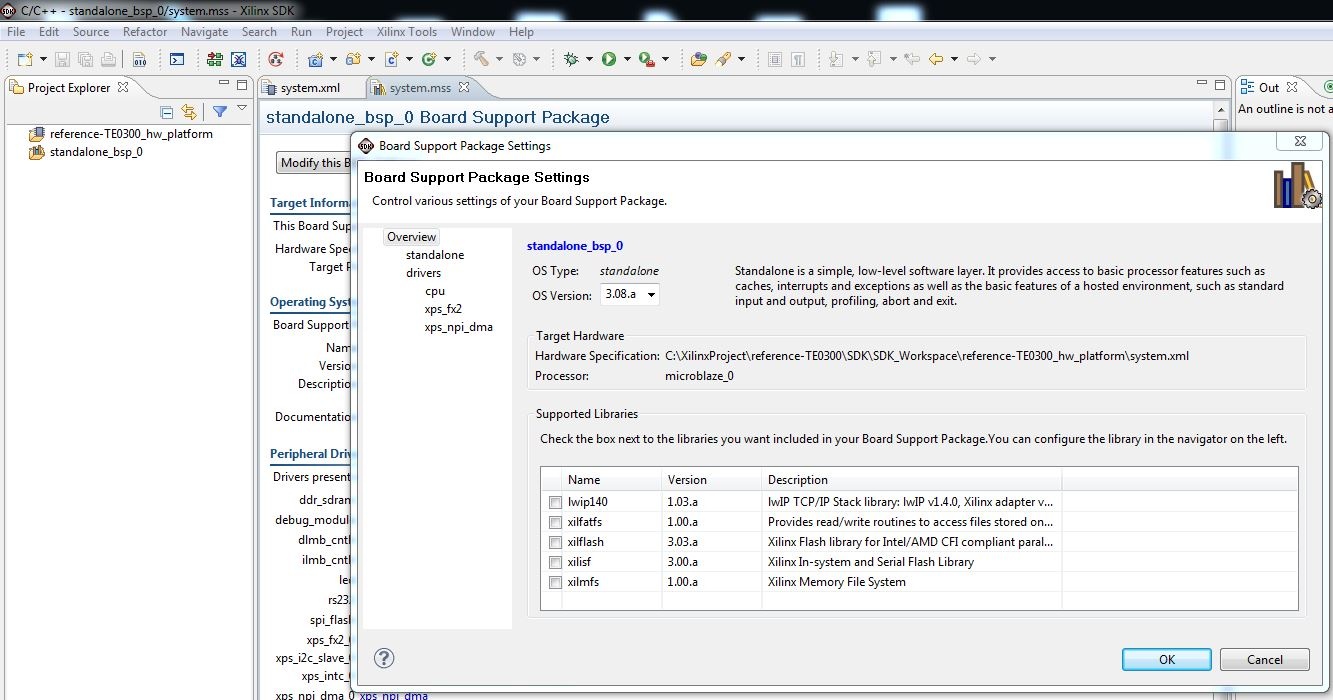
BSP overview
- after this you should click "standalone" and set "stdin" and "stdout" to "rs232" or "debug_module"
- you should select "rs232" if you desire to use an external UART
- you should select "debug_module" if you desire that the XMD_UART works as local UART through the JTAG connection
Demo program (running on MicroBlaze) will work even in case the UART port is left unconnected: it is not necessary to use a USB/Uart converter or Uart port on a PC, if you are using XMD UART HDL block.
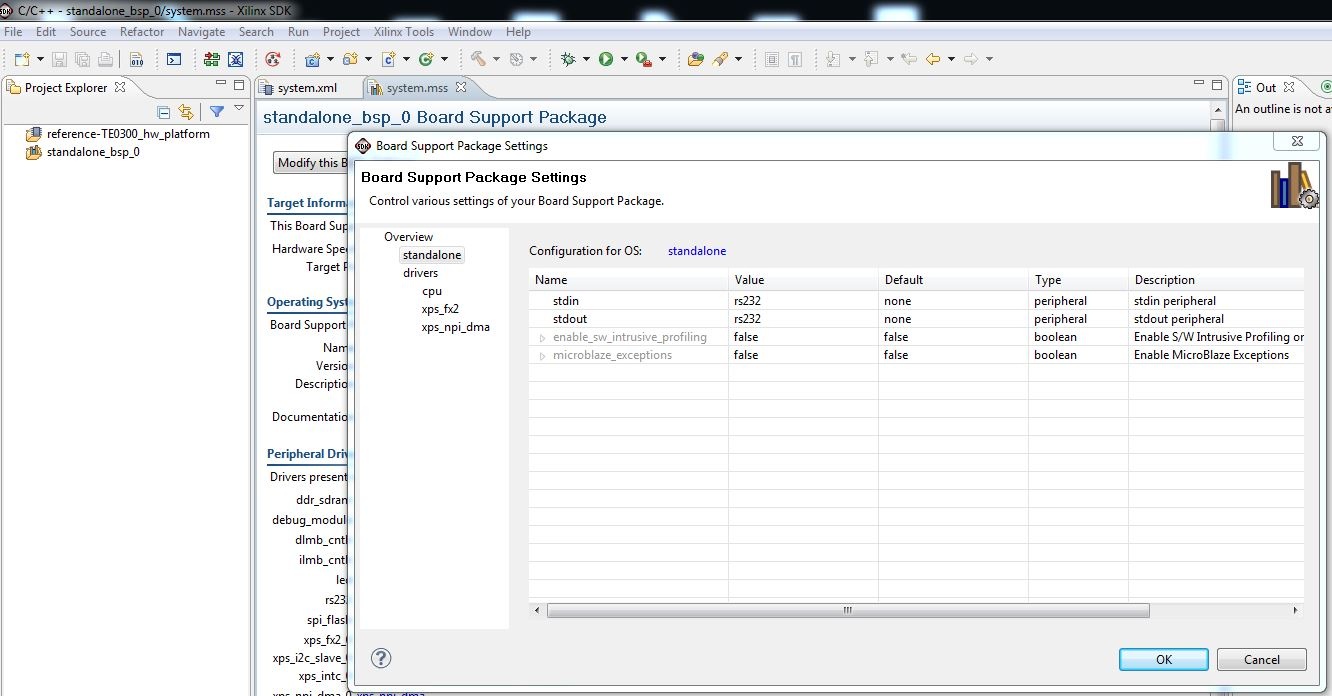
BSP rs232 or debug_module
- after this you should click drivers to verify that all Microblaze components are supported by the driver in the repository C:\XilinxProject\TE-EDK-IP; click "OK" and the pop-up should dissapears;
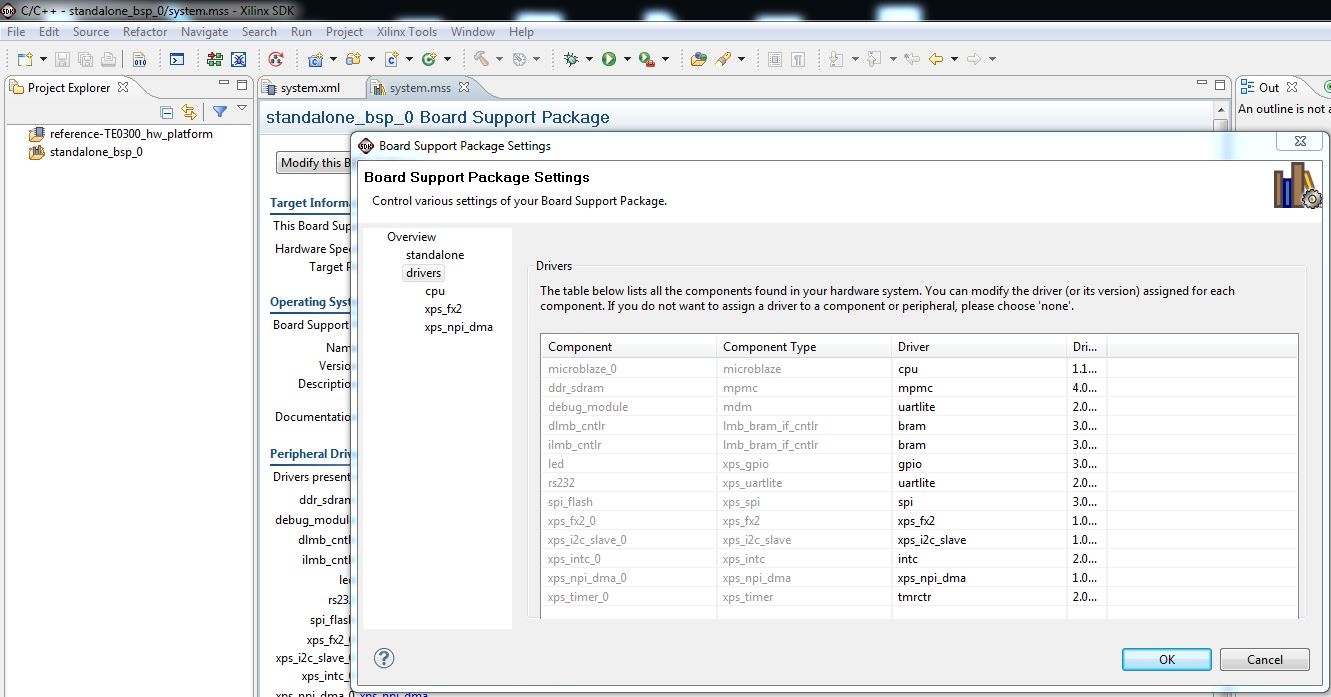
BSP drivers for Microblaze components
- after you have verified that all Microblaze components are supported by a driver, right click the "standalone_bsp_0" folder in "Project Explorer" and
- the pop-up "Properties for standalone_bsp_0" should appears
- click "Project References"
- you must verify that "standalone_bsp_0" references to "reference-TE0300_hw_platform":if is not checked you must check the box.
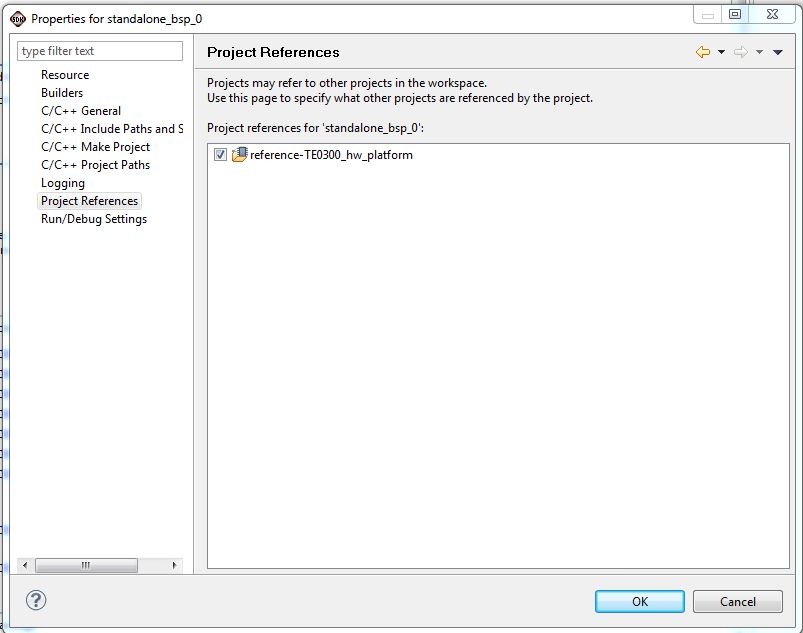
"standalone_bsp_0" Project References
- the FX2 microcontroller on the TE0300, TE0320 or TE0630 family should contain valid firmware before proceeding. If the FX2 microcontroller has not been programmed before, please follow the instructions in the ????? family User Manuals. You can use Cypress, Python OpenFut or C# OpenFutNet programs.
- If you are sure that the FX2 microcontroller is properly connected, you can connect to the TE0300/TE0320/TE0630 module with a JTAG adapter cable. We recommend using the Xilinx Platform Cable USB. Then connect the TE0300/TE0320/TE0630 module to a USB cable.
If the HDL design was successfully implemented and downloaded to the TE0300/TE0320/TE0630 family module, you can proceed to compile the MB software. Press the "build all user applications" button.
Overview
Content Tools