Page History
...
Board Part Names of the base folder consists of max. three parts separated by underline character.
| Usage of the part of name |
|---|
| Example 1 |
|---|
| Example 2 |
|---|
| Example 3 | Example |
|---|
| 4 | |||
|---|---|---|---|
| Name of the PCB Series | Always | TE0726 | TE0745 |
| TE0720 |
| TE0711 |
| FPGA Size |
|---|
| Optional |
| 30 |
| 35 | |||||
| FPGA Speed/Temperature Grade | Optional | 1C | 2C |
|---|
Board Part Version Folder
Version folder Name consists on a major and minor number separated by a dot (<major>.<minor>, example 1.0) Different Version folder means:
| Major |
|
|---|---|
| Minor |
|
Attention: Changes on the settings of the TE Board Part Files by itself are not under version control at the moment, like described in Xilinx ug895. XML file includes a comment header with the date of the last changes change of this the selected file.
Location
Board Part Files will be delivered with our Reference Designs on our https://shop.trenz-electronic.de/en/Download/?path=Trenz_Electronic/<module_name>/Reference_Design/<vivado_version>/<design_name>.
...
This folder includes also a *_board_files.csv file with a list of all available board parts. This list is only used by TE-Scripts.
Select Correct Board
...
Part Files
- Check <design_name>/board_files/<board_series>_board_files.csv for available board part of the reference design:
!How to Do will be coming soon!
- Check your order number and/or TE shop page to get module information of your PCB:
!How to Do will be coming soon!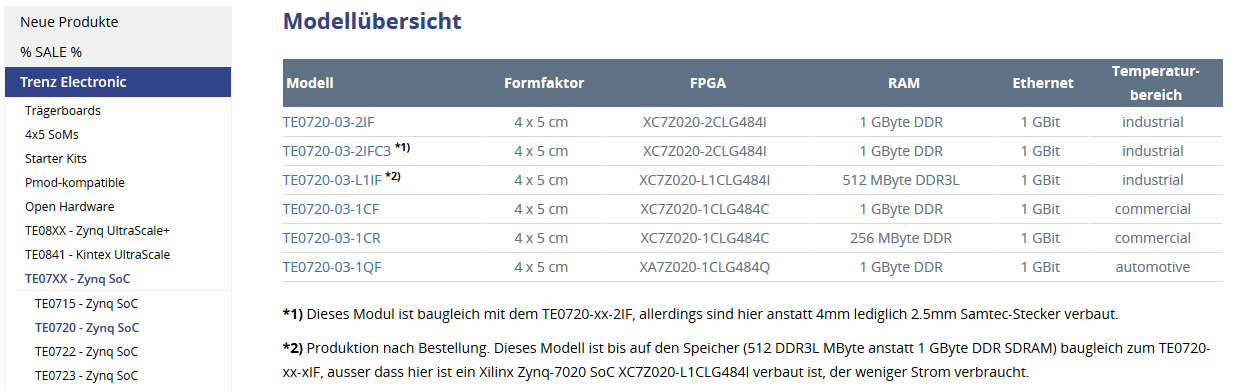
- Select your board part file on design_basic_settings.cmd:
!How to Do will be coming soon!
See Reference Design: Getting Started for more details. - Verify your board part selection on Vivado "Project Summary" tap:
!How to Do will be coming soon!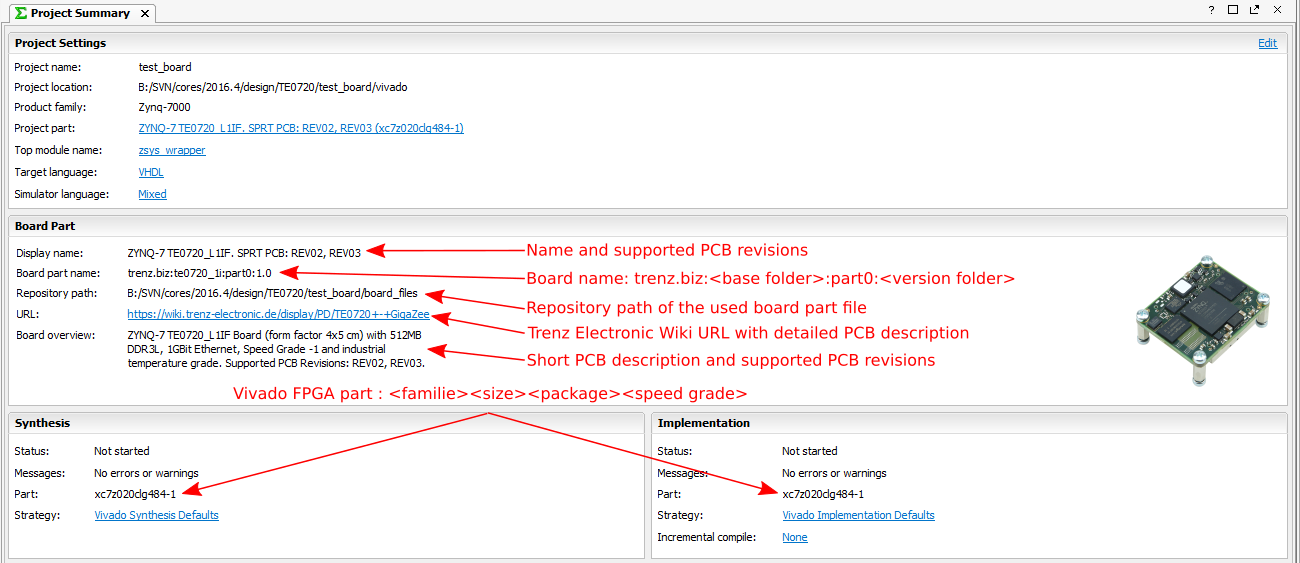
Installation
See Vivado Board Part Installation and Project Delivery - QuickStart
Overview
Content Tools