Page History
...
| Date | Vivado | Project Built | Authors | Description |
|---|---|---|---|---|
| 2018-07-11 | 2018.2 | te0726-test_board_noprebuilt-vivado_2018.2-build_02_20180711113737.zip te0726-test_board-vivado_2018.2-build_02_20180711113722.zip | John Hartfiel |
|
| 2018-02-17 | 2017.4 | te0726-test_board-vivado_2017.4-build_08_20180517084735.zip te0726-test_board_noprebuilt-vivado_2017.4-build_08_20180517084604.zip | John Hartfiel |
|
| 2018-02-16 | 2017.4 | te0726-test_board-vivado_2017.4-build_06_20180216205357.zip te0726-test_board_noprebuilt-vivado_2017.4-build_06_20180216205410.zip | John Hartfiel |
|
| 2018-01-31 | 2017.4 | te0726-test_board-vivado_2017.4-build_05_20180131115412.zip te0726-test_board_noprebuilt-vivado_2017.4-build_05_20180131115451.zip | John Hartfiel |
|
...
| Software | Version | Note |
|---|---|---|
| Vivado | 20172018.42 | needed |
| SDK | 20172018.42 | needed |
| PetaLinux | 20172018.42 | needed |
Hardware
| HTML |
|---|
<!-- Hardware Support --> |
...
| Module Model | Board Part Short Name | PCB Revision Support | DDR | QSPI Flash | Others | Notes |
|---|---|---|---|---|---|---|
| te0726-01 | 01 | REV01 | 128MB 64MB LPDDR2 | 16MB | ||
| te0726-03r | r | REV02, REV03 | 128MB DDR3L | 16MB | ||
| te0726-03m | m | REV02, REV03 | 512MB DDR3L | 16MB | ||
| te0726-03-07s-1c | 7s | REV03 | 512MB DDR3L | 16MB |
...
Reference Design is available on:
Design Flow
| HTML |
|---|
<!-- Basic Design Steps Add/ Remove project specific --> |
...
- _create_win_setup.cmd/_create_linux_setup.sh and follow instructions on shell:
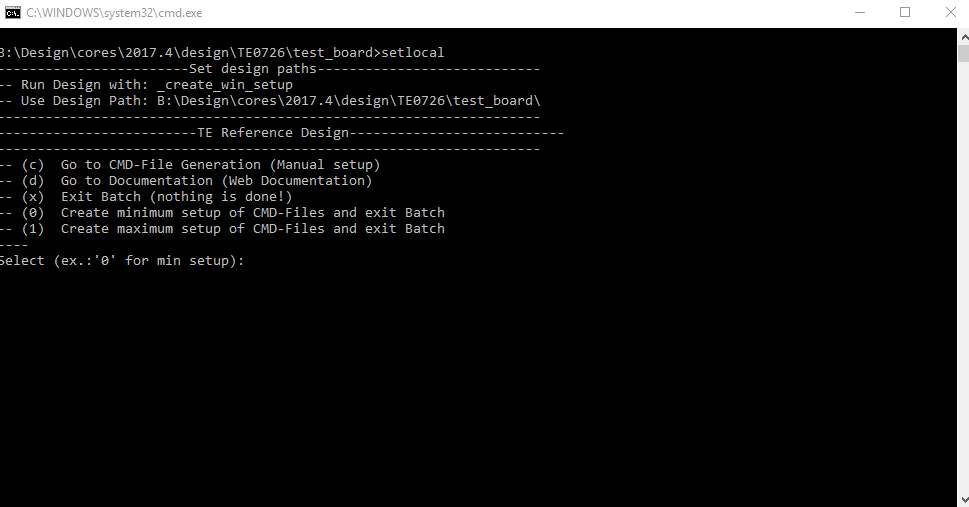
- Press 0 and enter for minimum setup
- (optional Win OS) Generate Virtual Drive or use short directory for the reference design (for example x:\<design name>)
- Create Project
- Select correct device and Xilinx install path on "design_basic_settings.cmd" and create Vivado project with "vivado_create_project_guimode.cmd"
Note: Select correct one, see TE Board Part Files
- Select correct device and Xilinx install path on "design_basic_settings.cmd" and create Vivado project with "vivado_create_project_guimode.cmd"
- Create HDF and export to prebuilt folder
- Run on Vivado TCL: TE::hw_build_design -export_prebuilt
Note: Script generate design and export files into \prebuilt\hardware\<short dir>. Use GUI is the same, except file export to prebuilt folder
- Run on Vivado TCL: TE::hw_build_design -export_prebuilt
- Create Linux (uboot.elf and image.ub) with exported HDF
- HDF is exported to "prebuilt\hardware\<short name>"
Note: HW Export from Vivado GUI create another path as default workspace. - Create Linux images on VM, see PetaLinux KICKstart
- Use TE Template from /os/petalinux
Note: run init_config.sh before you start petalinux config. This will set correct temporary path variable. - For 128MB and 64MB only:Netboot Offset must be reduced manually, see Config
- Use TE Template from /os/petalinux
- HDF is exported to "prebuilt\hardware\<short name>"
- Add Linux files (uboot.elf and image.ub) to prebuilt folder
- "prebuilt\os\petalinux\default" or "prebuilt\os\petalinux\<short name>"
Notes: Scripts select "prebuilt\os\petalinux\<short name>", if exist, otherwise "prebuilt\os\petalinux\default"
- "prebuilt\os\petalinux\default" or "prebuilt\os\petalinux\<short name>"
- Generate Programming Files with HSI/SDK
- Run on Vivado TCL: TE::sw_run_hsi
Note: Scripts generate applications and bootable files, which are defined in "sw_lib\apps_list.csv" - (alternative) Start SDK with Vivado GUI or start with TE Scripts on Vivado TCL: TE::sw_run_sdk
Note: See SDK Projects
- Run on Vivado TCL: TE::sw_run_hsi
| Note |
|---|
Since Vivado 2017.4 FSBL is needed to program QSPI. (2017.2 works without FSBL). Xilinx mini-uboot starts with this FSBL configuration but needs QSPI FB CLK enabled on PS. On TE0726, this MIO is used for UART, so special design is need to generate this FSBL. This reference design contains a prebuilt FSBL for QSPI programming (zynqmp_fsbl_flash), so there is normally no need to regenerate this special FSBL. In case of generate this by yourself following steps are needed
|
Launch
Programming
| HTML |
|---|
<!--
Description of Block Design, Constrains...
BD Pictures from Export...
--> |
Launch
Programming
| HTML |
|---|
<!--
Description of Block Design, Constrains...
BD Pictures from Export...
--> |
| Note |
|---|
| Note |
Check Module and Carrier TRMs for proper HW configuration before you try any design. |
...
- Connect JTAG and power on carrier with module
- Open Vivado Project with "vivado_open_existing_project_guimode.cmd" or if not created, create with "vivado_create_project_guimode.cmd"
- Type on Vivado TCL Console: TE::pr_program_flash_binfile -swapp u-boot
Note: To program with SDK/Vivado GUI, use special FSBL (zynqmp_fsbl_flash) on setupsetup
optional "TE::pr_program_flash_binfile -swapp hello_te0726" possible - Copy image.ub on SD-Card
- For correct prebuilt file location, see <design_name>/prebuilt/readme_file_location.txt
- Insert SD-Card
...
For SDK project creation, follow instructions from:
Application
SDK template in ./sw_lib/sw_apps/ available.
zynqmp_fsbl
Xilinx default FSBL
zynqmp_fsbl_flash
TE modified 20172018.4 2 FSBL
Changes:
- Set FSBL Boot Mode to JTAG
- Disable Memory initialisation
...
u-
...
booz
U-Boot.elf is generated with PetaLinux. SDK/HSI is used to generate Boot.bin.
hello_te0726
Hello TE0726
...
is a Xilinx Hello World App in example as endless loop instead of one console output.
Software Design - PetaLinux
...
Config
For 64MB variant only:
- CONFIG_SUBSYSTEM_NETBOOT_OFFSET = 0x2000000
For 128MB variant only:
- CONFIG_SUBSYSTEM_NETBOOT_OFFSET = 0x4000000
U-Boot
No changes.
Device Tree
| Code Block | ||
|---|---|---|
| ||
/include/ "system-conf.dtsi"
/ {
};


/* USB PHY */

/{
    usb_phy0: usb_phy@0 {
        compatible = "ulpi-phy";
        #phy-cells = <0>;
        reg = <0xe0002000 0x1000>;
        view-port = <0x0170>;
        drv-vbus;
    };
};

&usb0 {
    dr_mode = "host";
    //dr_mode = "peripheral";
    usb-phy = <&usb_phy0>;
};

/* I2C1 */

&i2c1 {
    #address-cells = <1>;
    #size-cells = <0>;

    i2cmux0: i2cmux@70  {
        compatible = "nxp,pca9544";
        #address-cells = <1>;
        #size-cells = <0>;
        reg = <0x70>;


        i2c1@0 {
            #address-cells = <1>;
            #size-cells = <0>;
            reg = <0>;

            id_eeprom@50 {
                compatible = "atmel,24c32";
                reg = <0x50>;
            };

        };
        i2c1@1 {    // Display Interface Connector
            #address-cells = <1>;
            #size-cells = <0>;
            reg = <1>;
        };
        i2c1@2 {    // HDMI Interface Connector
            #address-cells = <1>;
            #size-cells = <0>;
            reg = <2>;
        };
        i2c1@3 {    // Camera Interface Connector
            #address-cells = <1>;
            #size-cells = <0>;
            reg = <3>;
        };
    };

};
|
...
| Date | Document Revision | Authors | Description | ||||||||||||||||||||||
|---|---|---|---|---|---|---|---|---|---|---|---|---|---|---|---|---|---|---|---|---|---|---|---|---|---|
|
|
|
| ||||||||||||||||||||||
| v.9 | John Hartfiel |
| |||||||||||||||||||||||
| v.8 | John Hartfiel |
| |||||||||||||||||||||||
| 2018-02-16 | v.6 | John Hartfiel |
| ||||||||||||||||||||||
| 2018-02-09 | v.5 | John Hartfiel |
| ||||||||||||||||||||||
| 2018-01-31 | v.1 |
|
| ||||||||||||||||||||||
| All |
|
...
Overview
Content Tools