Page History
| Page properties | ||||
|---|---|---|---|---|
| ||||
Diese Seite wird verwaltet von der identischen Seite bei TEI0015 |
Table of Content
| Table of Contents |
|---|
Download
Compressed folder, containing all necessary files for the demo - Download-Link
The compressed folder needs to be extracted, so that the contend can be used inside other programs.
The demo itself requires the installation of Visual Analog (Version 1.9.48.1) - Download Link
2 Variants available:
- TEI0016-0x-08-C8A assembled with ADAQ7988BCCZ (500kS/s)
- TEI0016-0x-08-C8B assembled with ADAQ7980BCCZ (1MS/s)
| Excerpt Include | ||||||
|---|---|---|---|---|---|---|
|
Visual Analog integration
Step by step guide for PCB revision -01
...
- Download FT_Prog 3.3.88.402 from "https://www.ftdichip.com/Support/Utilities.htm".
- Install FT_Prog.
- Start FT_Prog.
- The window should look like Figure 1.

- Press "F5" or select "DEVICES → Scan and Parse" to find the FTDI chip.
- The window should look like Figure 2.
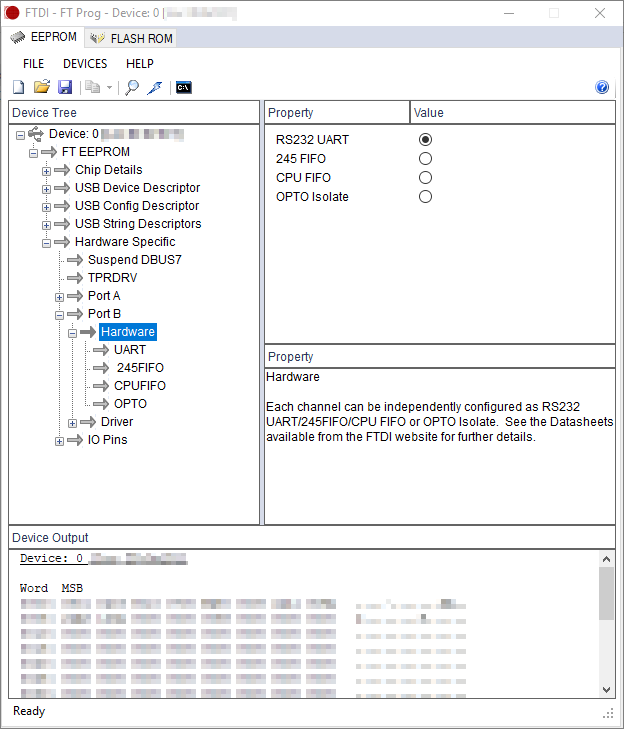
- Open the "Hardware Specific → Port B → Hardware" as visible in Figure 2.
- Select "OPTO Isolate" on the right side, as visible in Figure 3.
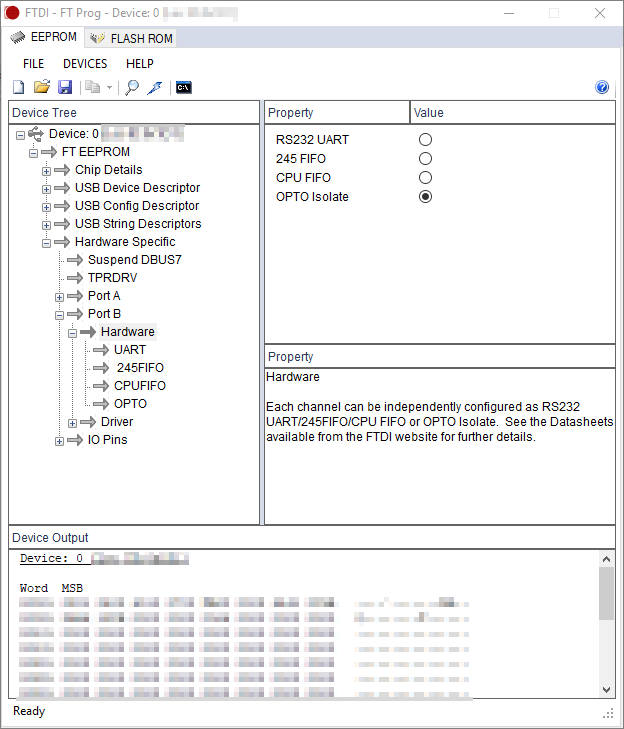
- Then, press "Ctrl+P" or select "DEVICES → PROGRAM" to change your FTDI FT2232H Port B to "OPTO Isolate" mode.
- Press "Program" in the new window, as visible in Figure 4.
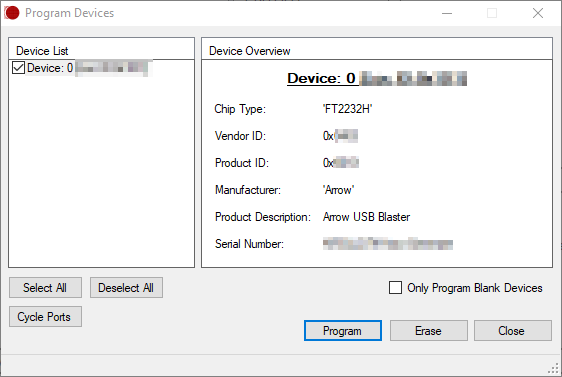
- After that, press "Cycle Ports" in the window shown in Figure 4 and then press "Close".
- After pressing "F5" and opening the path "Hardware Specific → Port B → Hardware", as visible in Figure 2, the value "OPTO Isolate" should be selected.
...
- Download Quartus Prime Software from "https://www.intel.de/content/www/de/de/software/programmable/quartus-prime/download.html". The Lite Edition is sufficient.
- Install Quartus Prime.
- Install Arrow-USB-Blaster-Setup-2.2.exe from "https://shop.trenz-electronic.de/de/Download/?path=Trenz_Electronic/Software/Drivers/Arrow_USB_Programmer/Arrow_USB_Programmer_2.2".
- Start the Quartus Prime Programmer.
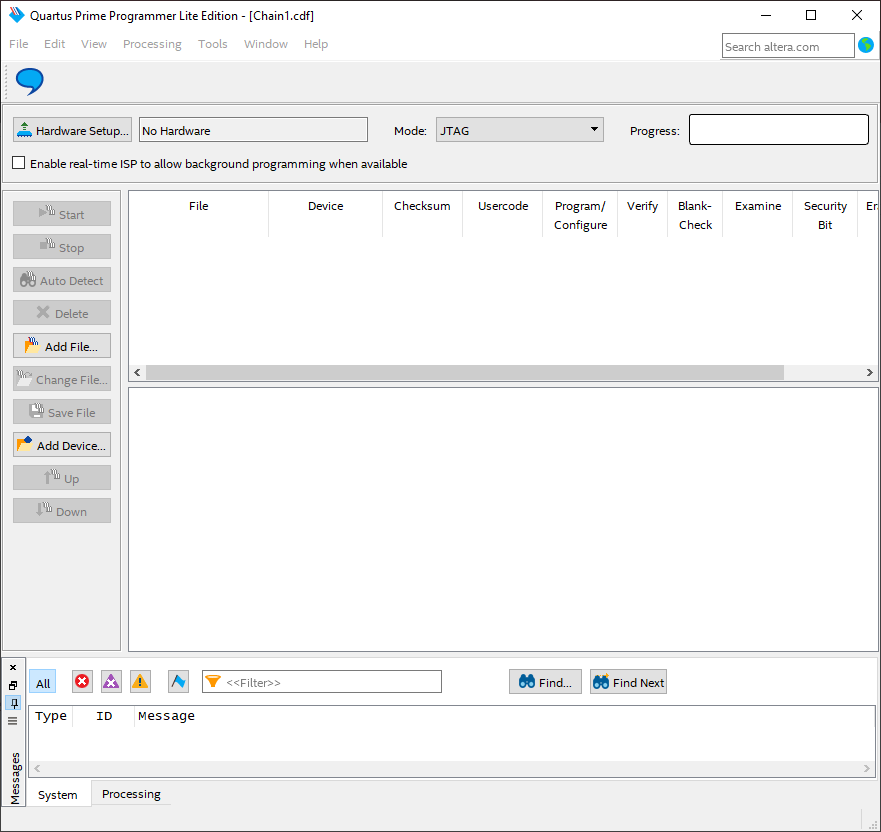
- The window should look like Figure 5.
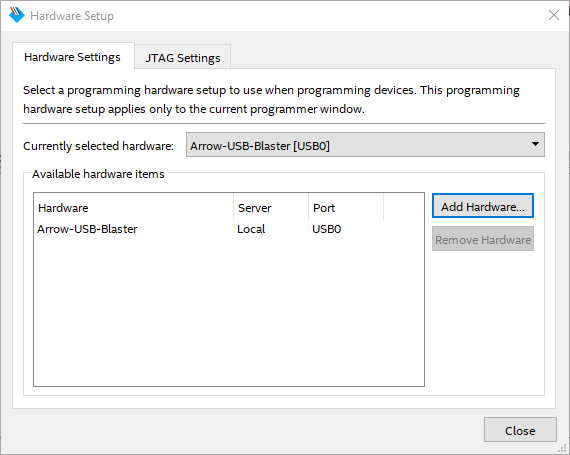
- Press "Hardware Setup..." and select "Arrow-USB-Blaster [USBX]" in "Currently selected hardware" as visible in Figure 6, whereby the "X" in [USBX] is a placeholder.
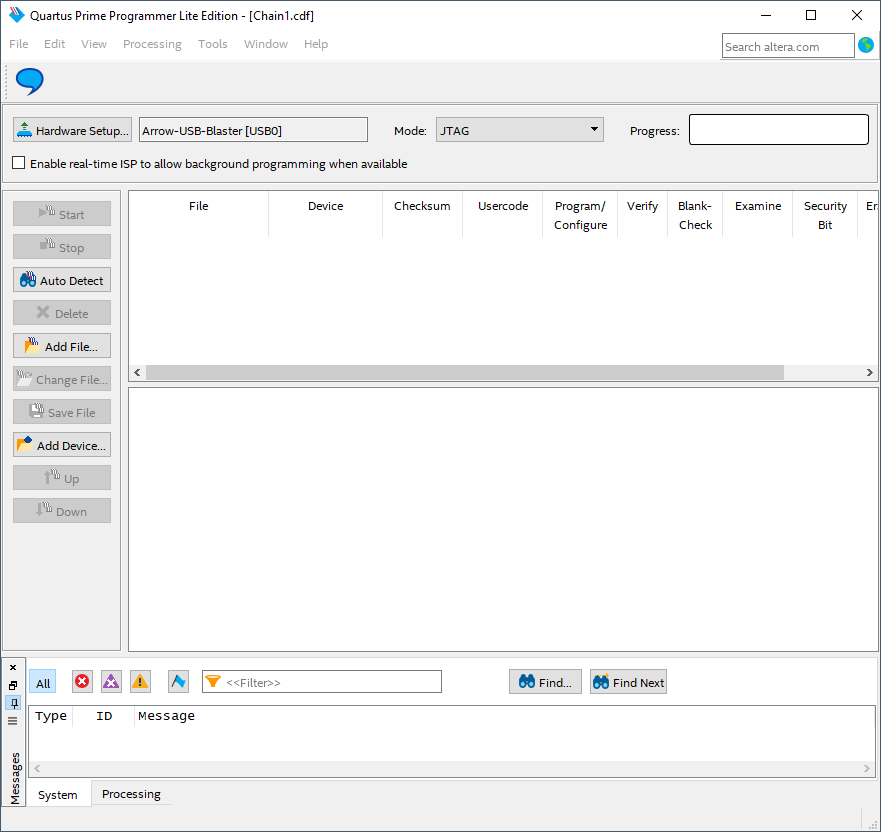
- Then, press "Close" and return to the previous window. The window should look like Figure 7.
- After that, use "Add File..." to select the file to program the FPGA. The window should look like Figure 8.

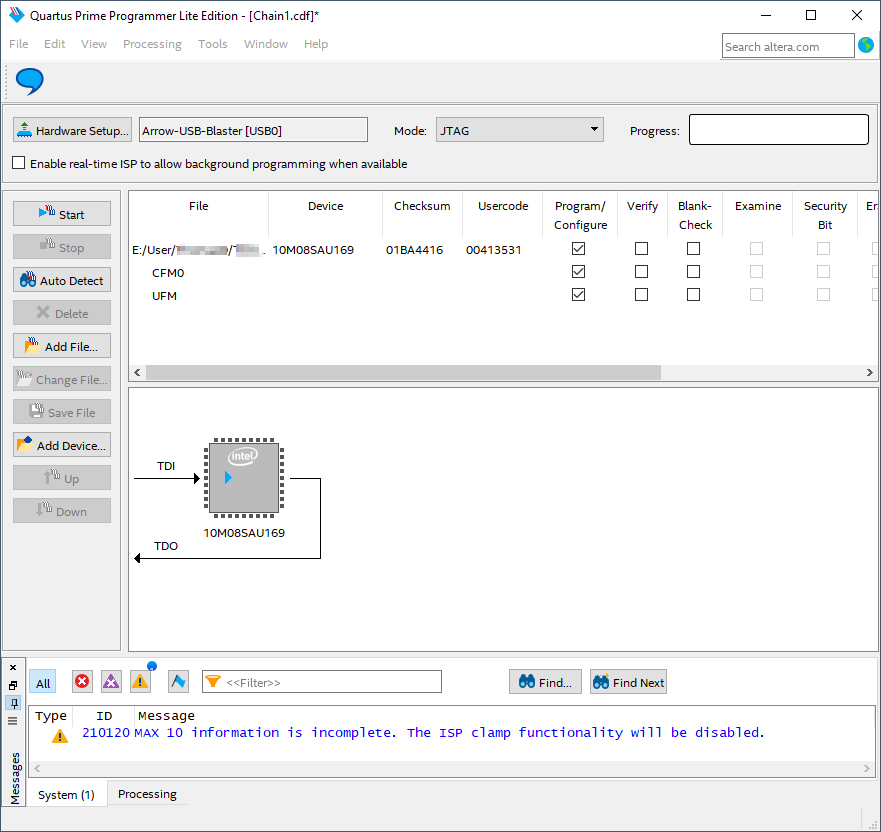
- Mark the "Program/Configure" box for the selected file. Then, the window should look like Figure 10.
- To program the FPGA use the button "Start".
- The Quartus Prime Programmer can be closed.
...
- Open the device manager.
- Open ports and identify the port used by the AnalogMAX DAQ1 as visible in Figure 11.

...
Overview
Content Tools