Page History
This chapter guides through the tasks which have to be done inside the Intel SoC Embedded Development Suite. As to create a user compiled kernel and root filesystem within a Linux system as mentioned in page "Board bring-up overview for TEI0022" this step is for preloader and bootloader generation which . It should be done in the following three sections:
- Toolchain setup
- Kernel
- Preparation
- Preloader/Bootloader generation
- Device Tree Root filesystem generation
The section "PreparationToolchain setup" describes preparing steps which are necessary for kernel generation, while the section "Kernel generation" handles the creation of the preloader kernel, and the bootloader which is described in section "Preloader/Bootloader generation". After that in section "Device Tree generation" the steps to create the device tree blob is explained.
Preparation
While Intel Quartus Prime project compilation, described on page Intel Quartus Prime Project, folder "hps_isw_handoff" is created which is now needed to generate via the bsp-editor further output for preloader and bootloader generation. To do the preparation, follow the following guide:
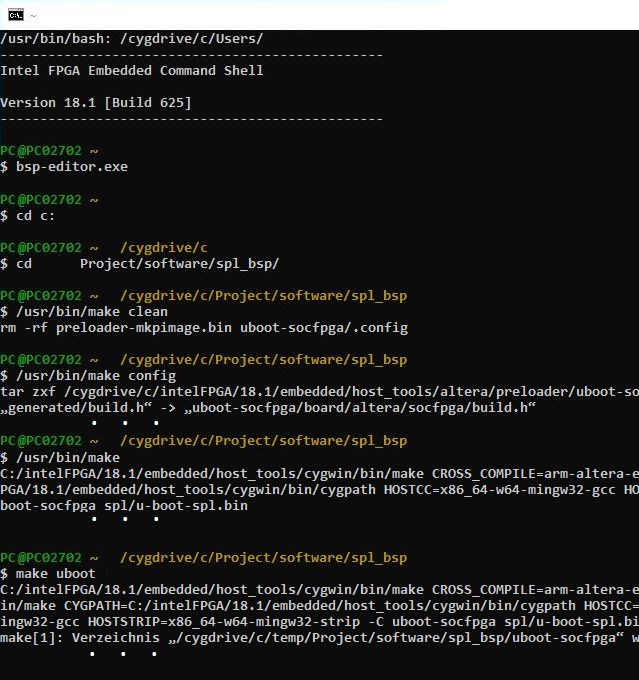
- Start the SoC EDS Shell as administrator. To do that navigate to C:\intelFPGA\18.1\embedded\ , right click on the file "Embedded_Command_Shell.bat", and select "Run as administrator". Click Yes in the window "User Account Control".
- In the opened shell start the bsp-editor, as visible in the next figure, via: bsp-editor.exe
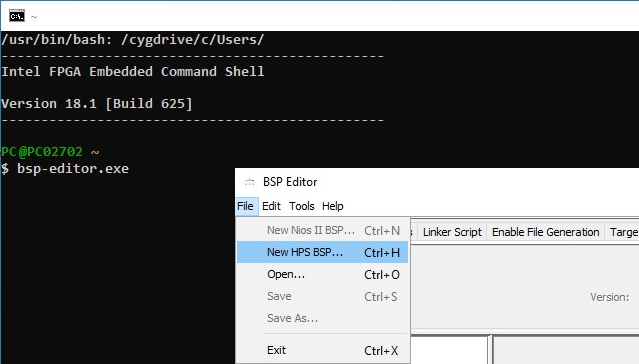
- In the opened bsp-editor select File → New HPS BSP...
- In the opened New BSP dialogue click onto ... and select the PlatformEditorHPS_hps_0 folder inside the hps_isw_handoff folder
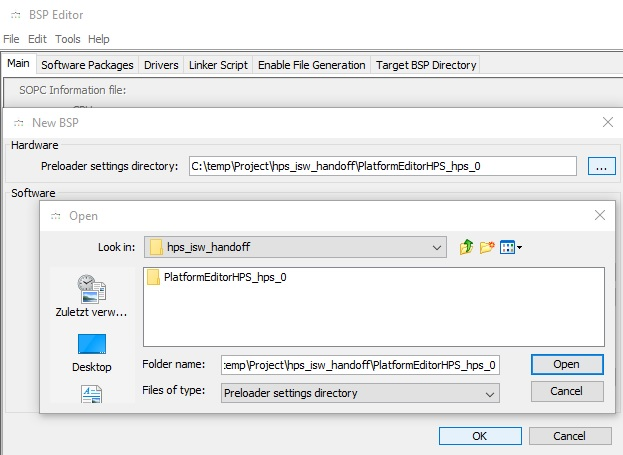
- After that, click Open in this dialogue and OK in the previous dialogue.
- Now, in the bsp-editor, the preloader should be configured. Select only BOOT_FROM_SDMMC as BOOT_FROM_-parameter in the right window under the spl.boot header.
- Select FAT_SUPPORT.
- Select 1 as FAT_BOOT_PARTITION.
- Select u-boot.img as FAT_LOAD_PAYLOAD_NAME.
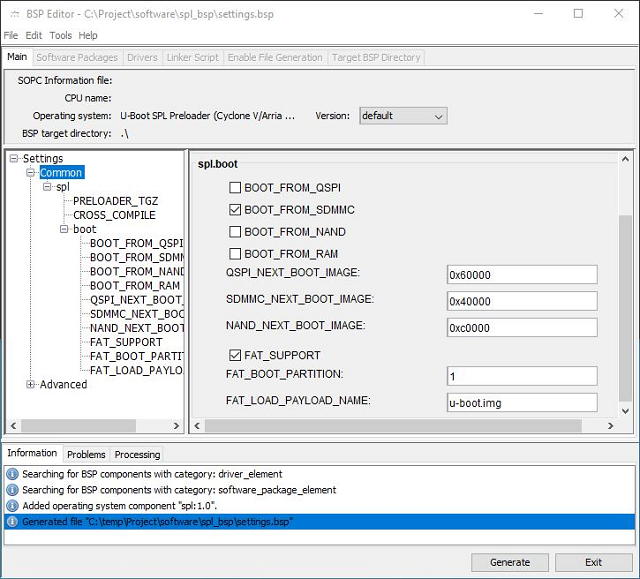
- Then, generate the output via clicking the Generate button.
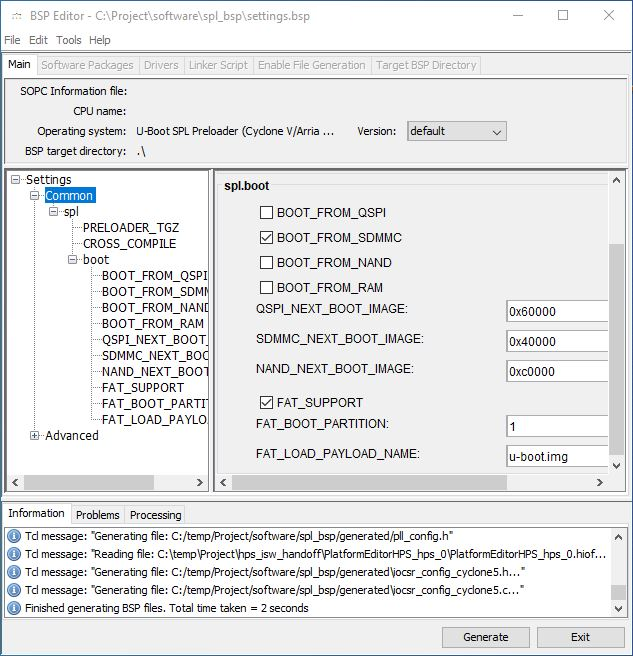
- After generation, an information like Finished generation BSP files. Total time taken = ... seconds is displayed in the information tab. The folder software in the project path should now be available.
- Close the bsp-editor.
Preloader/Bootloader generation
After this preparation, it is possible to generate the preloader and the bootloader inside the shell while following the guide:
- Change into folder .../software/spl_bsp inside the project folder with the change directory command cd. For example: cd Project/software/spl_bsp
- Clean the folder via running /usr/bin/make clean
- Configure the build process via /usr/bin/make config which generates the folder .../software/spl_bsp/uboot-socfpga.
- Generate the preloader via /usr/bin/make which generates the file .../software/spl_bsp/preloader-mkpimage.bin.
- Generate the bootloader via /usr/bin/make uboot which generates the image .../software/spl_bsp/uboot-socfpga/u-boot.img.
- If the make process ends with an error, try to rerun /usr/bin/make uboot until there is no error and the output is generated.
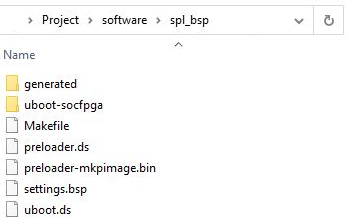
After that, the folder .../software/spl_bsp/ should look like the following figure.
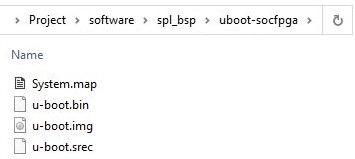
The folder .../software/spl_bsp/uboot-socfpga should contain the files shown in the next figure.
Device Tree generation
The device tree generation is a crucial part to tell the linux kernel which hardware has to be handled. To generate the device tree blob follow this guide:
- For device tree generation the Golden Hardware Reference Design file .../intelFPGA/18.1/embedded/examples/hardware/cv_soc_devkit_ghrd/hps_common_board_info.xml is needed. Therefore, copy this file into the project folder where the software folder, the output_files folder, ... are. This file contains information regarding the board which can be adapted, if necessary.
- Generate the device tree via the shell command: sopc2dts --input <Project Name>.sopcinfo --output socfpga.dtb --type dtb --board hps_common_board_info.xml --bridge-removal all --clocks
- The output in the following listing can be ignored.
...
| title | Device Tree Generation |
|---|---|
| linenumbers | true |
| collapse | true |
...
Root filesystem generation" shows the creation of the root filesystem.
Preparation
This guide leads through the toolchain setup task.
- Create a new folder in a known existing folder via mkdir toolchain
- Download the toolchain from linaro for the appropriate architecture and version via e.g. wget http://releases.linaro.org/components/toolchain/binaries/latest-7/arm-linux-gnueabihf/gcc-linaro-7.5.0-2019.12-x86_64_arm-linux-gnueabihf.tar.xz
- Decompress the tar-archiv via tar -xvf gcc-linaro-7.5.0-2019.12-x86_64_arm-linux-gnueabihf.tar.xz
- Set the CROSS_COMPILE variable to cross-compile the source code via export CROSS_COMPILE=$PWD/gcc-linaro-7.5.0-2019.12-x86_64_arm-linux-gnueabihf/bin/arm-linux-gnueabihf-
Kernel generation
This guide leads through the kernel generation task.
- Create a new folder in a known existing folder via mkdir software
- Change into the new folder via cd software
- Clone the git repository via git clone https://github.com/altera-opensource/linux-socfpga.git
- Change into the new folder via cd linux-socfpga
- Select one of the tags and check it out via git checkout rel_socfpga-4.14.130-ltsi_21.10.01_pr
- Load the default configuration for the kernel via make ARCH=arm socfpga_defconfig
- Install packages for kernel configuration via sudo apt-get install libncurses5-dev
- Open the kernel configuration dialogue via make ARCH=arm menuconfig
- Configure the kernel in this window:
- General Setup → Disable Automatically append version information to the version string
- Enable the block layer → Support for large (2TB+) block devices and files
- Generate the kernel via make ARCH=arm LOCALVERSION= zImage
- After compilation, which can last a longer time, the kernel should be in folder arch/arm/boot
This zImage file is important to create the SD card for booting.
Root filesystem generation
This guide leads through the rootfile system generation.
- Create a new folder in a known existing folder via mkdir rootfs
- Change into the new folder via cd rootfs
- Clone the git repository via git clone https://github.com/buildroot/buildroot
- Change into the new folder via cd buildroot
- Look into the branch overview inside the repository via git branch -a
- Select one of the branches and check it out via git checkout <selection>
- Open the buildroot configuration dialogue via make nconfig
- Configure the buildroot in this window:
- Target options → Target Architecture → ARM (little endian)
- Target options → Target Architecture Variant → cortex-A9
- Target options → Target ABI → EABI
- Target options → Enable NEON SIMD extension support
- Target options → Floating point strategy → NEON
- Toolchain → Toolchain type → Buildroot toolchain
- System Configuration → System hostname → <Select a name>
- System Configuration → System banner → <Select a system banner>
- System Configuration → Init System → BusyBox
- System Configuration → /dev management → Dynamic using devtmpfs only
- System Configuration → Enable root login with password
- System Configuration → Root password → root
- System Configuration →Enable Run a getty (login prompt) after boot
- Filesystem images → Enable tar the root filesystem
- Save the configuration via F6 → Enter → Enter
- Exit the configuration menu via F9
- Configure BusyBox if desired via make busybox-menuconfig
- Generate the root filesystem via make all
- After compilation, which can can last a longer time, the root filesystem (rootfs.tar) should be in folder buildroot/output/images/
This root filesystem is important to create the SD card for booting.
Overview
Content Tools