Page History
...
- Connect JTAG and power on carrier with module
- Open Vivado Project with "vivado_open_existing_project_guimode.cmd" or if not created, create with "vivado_create_project_guimode.cmd"
- Type on Vivado TCL Console: TE::pr_program_flash_binfile -swapp u-boot
Note: To program with SDK/Vivado GUI, use special FSBL (zynqmp_fsbl_flash) on setup
optional "TE::pr_program_flash_binfile -swapp hello_te0823" possible - Copy image.ub on SD-Card
- use files from (<project foler>/_binaries_<Artikel Name>)/boot_linux from generated binary folder,see: Get prebuilt boot binaries
- or use prebuilt file location, see <design_name>/prebuilt/readme_file_location.txt
- Insert SD-Card
...
- Prepare HW like described on section 98140336 Programming
- Connect UART USB (most cases same as JTAG)
- Select SD Card or QSPI as Boot Mode (Depends on used programming variant)
Note: See TRM of the Carrier, which is used. - Power On PCB
Note: 1. ZynqMP Boot ROM loads PMU Firmware and FSBL from SD/QSPI Flash into OCM, 2. FSBL loads ATF(bl31.elf) and U-boot from SD into DDR, 3. U-boot load Linux from SD into DDR
...
| Page properties | ||||
|---|---|---|---|---|
| ||||
Note:
|
Block Design
...
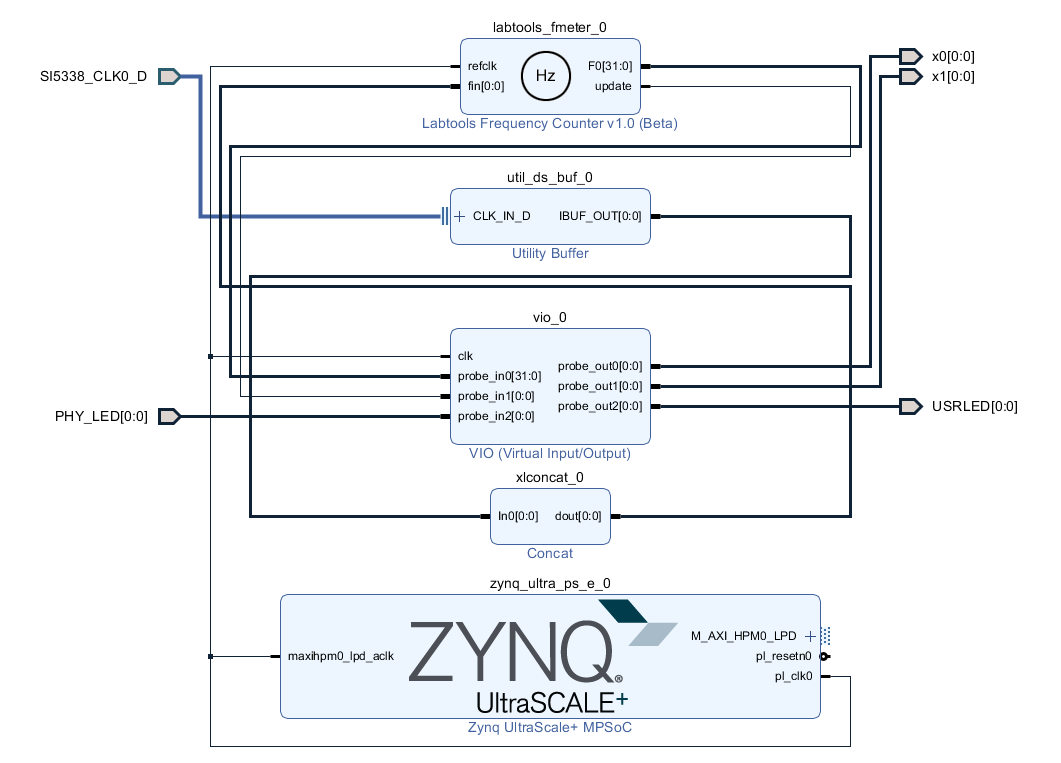
PS Interfaces
Activated interfaces:
...
Overview
Content Tools