When Xilinx SDK open, you should:
1) Set the repositories for device driver of custom block used in SDK Microblaze project
- click Xilinx "Xilinx Tools" and then "Repositories"

XilinxSDKProjectRepositories
- after this a pop-up "Preferences" will appears

Add Reference Repositories for custom driver of custom block/device
- click "New..." button of "Local Repositories (available to the current workspace)"
- select C:\XilinxProject\TE-EDK-IP

Add reference with double indirection (as required by Xilinx SDK)
- click "Apply"
- you should click "OK"
- after this you must wait until the building procedure ended.
2) Create an Hardware Platform Specification Project
- You should click "File" >"New" > "Project"

Xilinx SDK New Project
- a pop up "New Project" will appears
- click"Xilinx">"Hardware Platform Specification", then next

Xilinx SDK new HW Platform Specification
- a new pop up "New Hardware Project" will appear

Xilinx SDK HW Project New Wizard 1
- under "Target Hardware Specification" click "Browse..." button
- a new pop up "Hardware Specification File" will appear

- select "system.xml", "C:\XilinxProject\reference-TE0300\SDK\SDK_Export\hw\system.xml"
- after the selection a new hardware specification (with name "reference-TE0300_hw_platform") appears in the Procject Explorer of SDK.

ReferenceHWplatform
3) Create a Board Support Package Project
- You should click "File" >"New" > "Project"
- a pop up "New Project" will appears
- click"Xilinx">"Board Support Package", then next
- a new pop up "New Board Support Package Project" will appear;
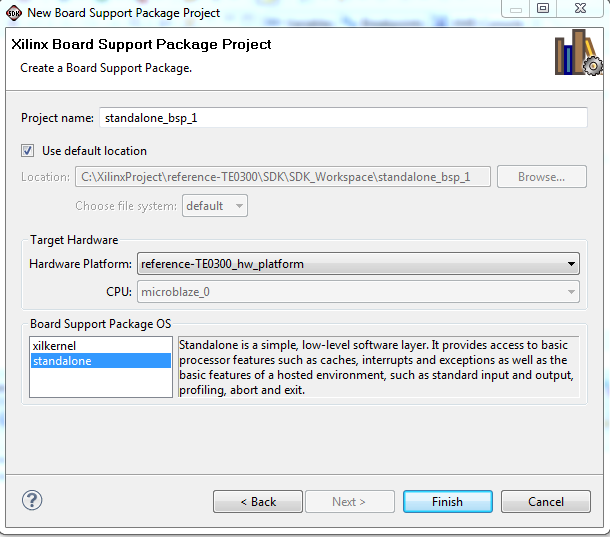
New Xilinx Board Support Packages
- select "standalone" for "Board Support Package OS" and "standalone_bsp_0" for the "Project name"
- a new pop-up will appear "Board Support Package Settings"
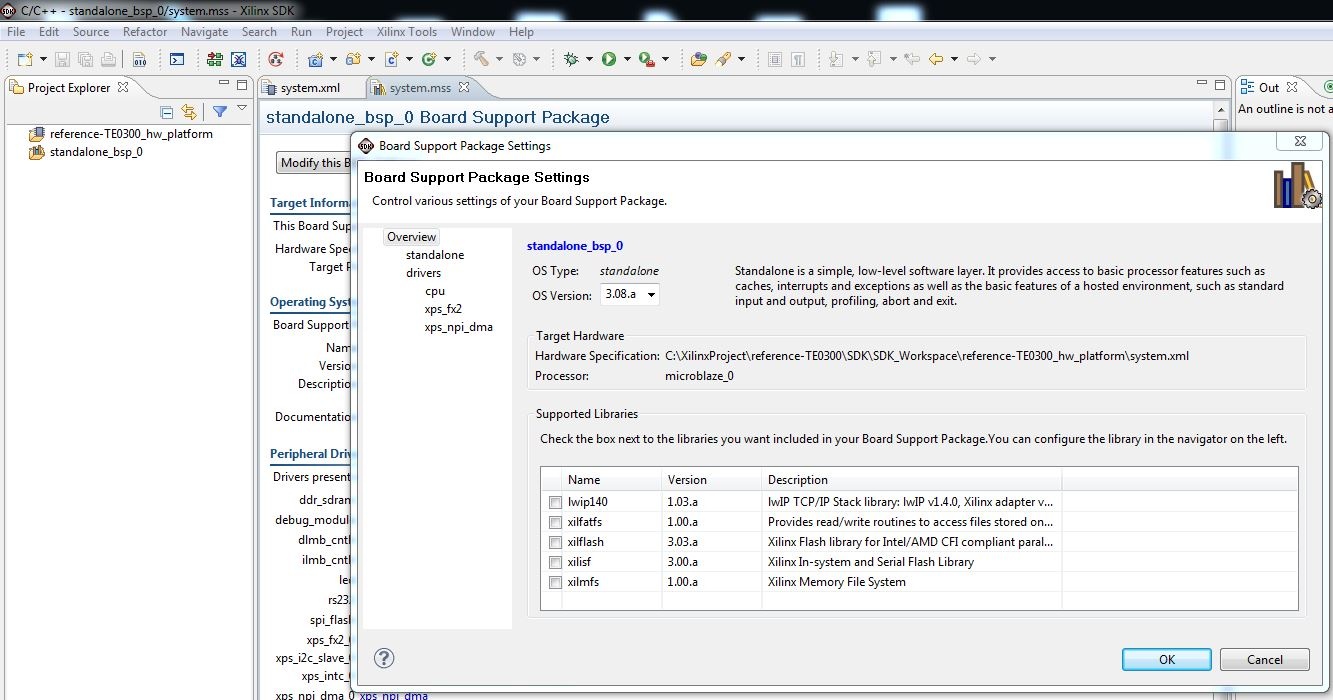
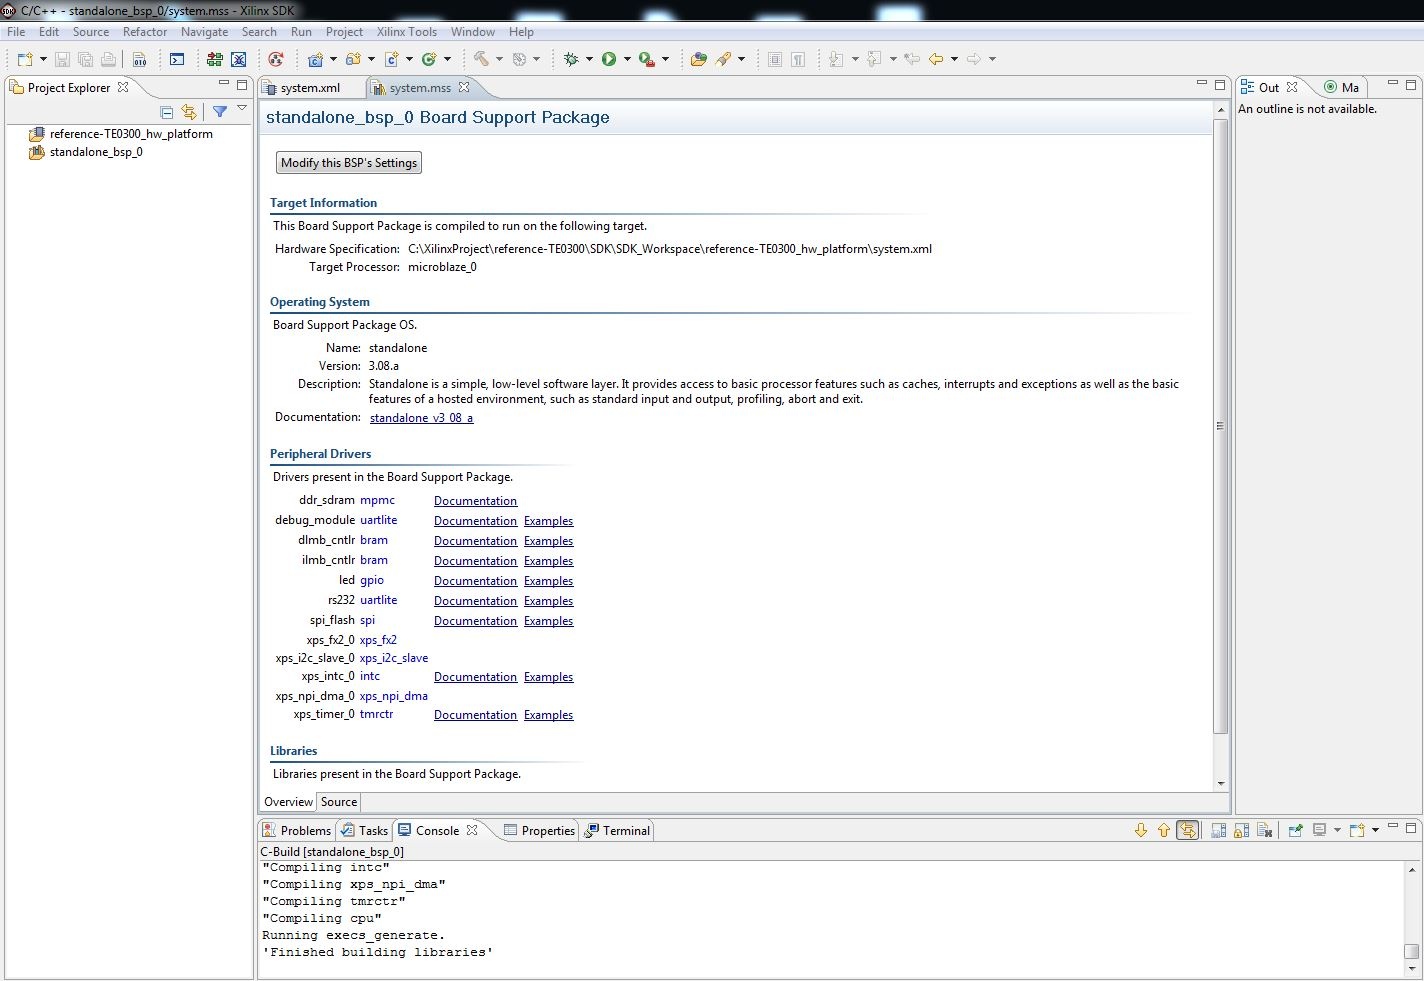
BSP overview
- after this you should click "standalone" and set "stdin" and "stdout" to "rs232" or "debug_module"
- you should select "rs232" if you desire to use an external UART
- you should select "debug_module" if you desire that the XMD_UART works as local UART through the JTAG connection
Demo program (running on MicroBlaze) will work even in case the UART port is left unconnected: it is not necessary to use a USB/Uart converter or Uart port on a PC, if you are using XMD UART HDL block.
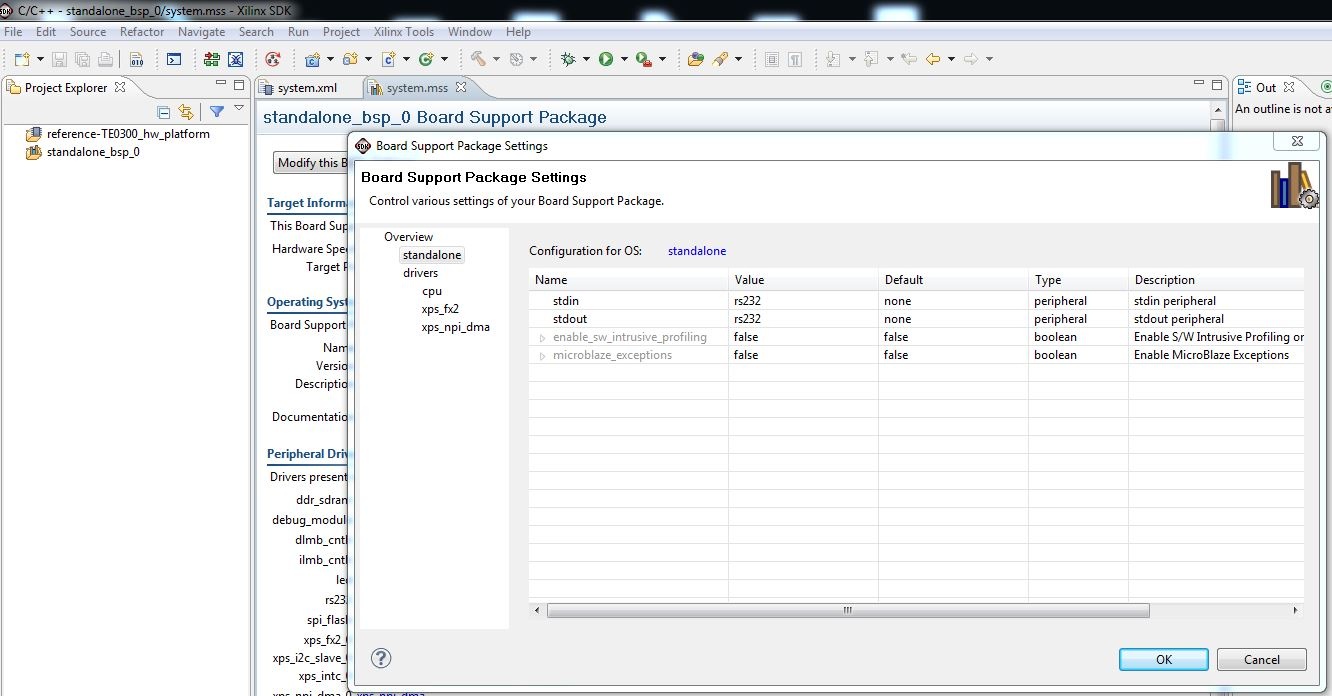
BSP rs232 or debug_module
- after this you should click drivers to verify that all Microblaze components are supported by the driver in the repository C:\XilinxProject\TE-EDK-IP; click "OK" and the pop-up should dissapears;
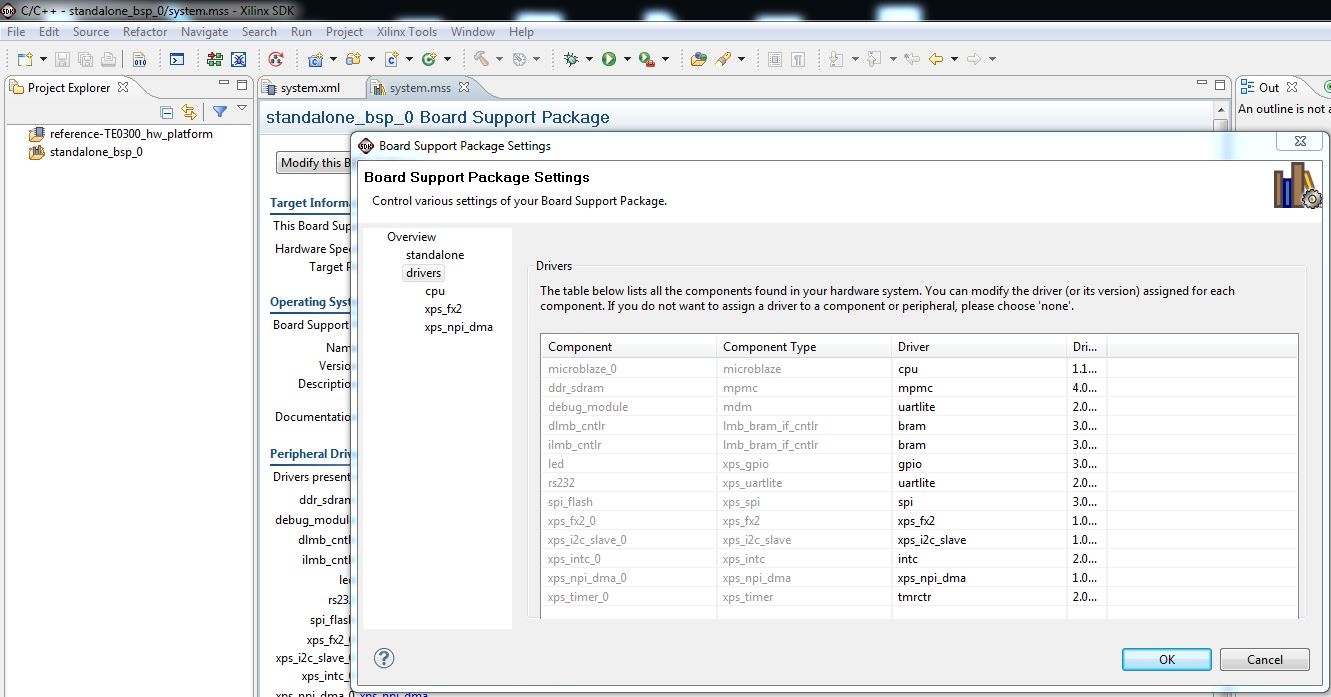
BSP drivers for Microblaze components
- after you have verified that all Microblaze components are supported by a driver, right click the "standalone_bsp_0" folder in "Project Explorer" and
- the pop-up "Properties for standalone_bsp_0" should appears
- click "Project References"
- you must verify that "standalone_bsp_0" references to "reference-TE0300_hw_platform":if is not checked you must check the box.
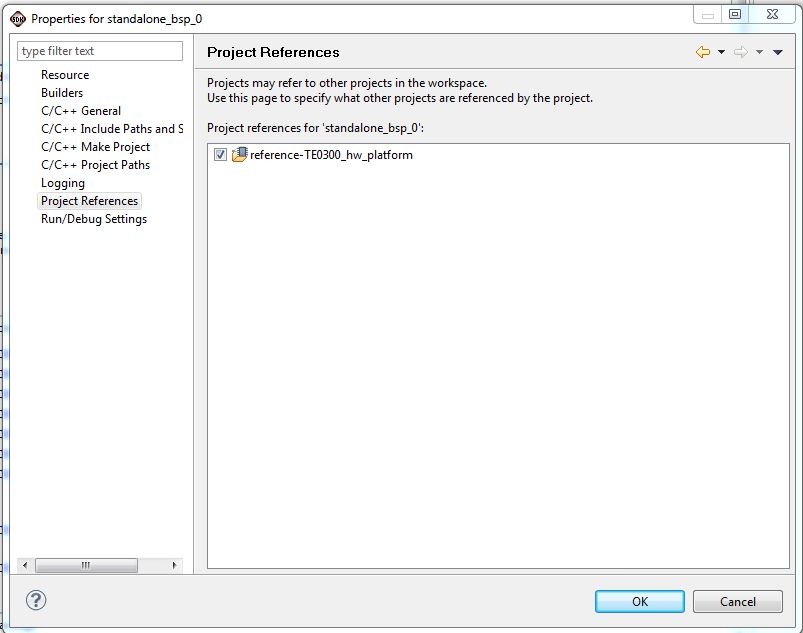
"standalone_bsp_0" Project References
- click "OK";
- after this, you should wait until the SDK compile the added files (C-Build [standalone_bsp_0]) and a message 'Finished building libraries' appears
4) (Re)Create the "Application Project" demo
- You should click "File" >"New" > "Project"
- a pop up "New Project" will appears
- click "Xilinx" > "Application Project", then next
- a new pop up "New Application Project" will appear;
- you should the value of parameters as in the image below

ApplicationProject demo creation
Overview
Content Tools