In order to generate a .mcs PROM file from the bitstream file download.bit, start Xilinx iMPACT. The following example shows the case of Xilinx iMPACT 11.3 (for other version the procedure doesn't change):
| |
|
New iMPACT Project
- Select step 1. storage target / Xilinx Flash/PROM of the left panel and press the left green arrow.
PROM File Formatter Step1
- Select step 2. add storage device(s) / auto select PROM of the middle panel and press the right green arrow.
- In step 3. enter data of the right panel
PROM File Formatter Step 3
Type fpga (or another name) in the "Output File Name" input field
Using OpenFut or OpenFutNet, there is no longer any restriction in the name of output file: any name for the output file name input field is allowed.
With the old 2nd generation program FWU any other name than fpga for the output file name input field is not allowed.Choose a suitable path for the "Output File Location" input field;
- Select mcs from the drop-down menu file format in the flash/PROM file property sub-panel;
Prom File Formatter Step 3, MCS selection
- Press the OK button in the bottom left corner of the current window.
| |
| |
| |
|
PROM File Formatter after Step 3
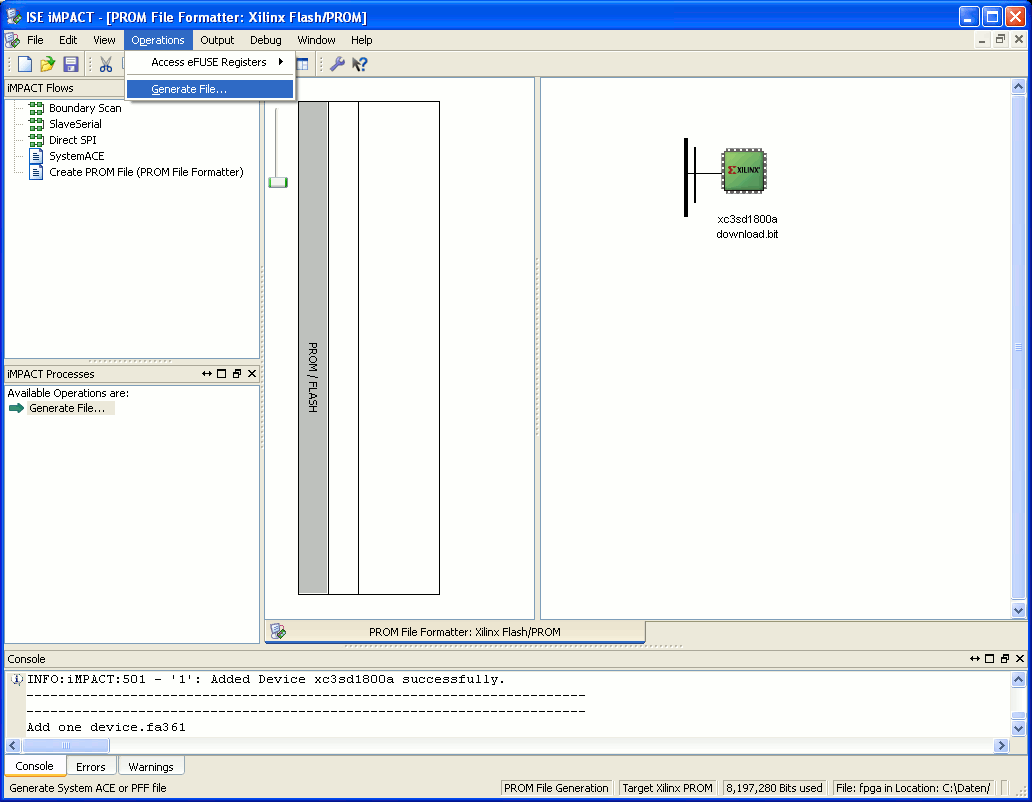
- Select operations / generate file... or double click generate file... from the iMPACT processes panel.
PROM File Formatter: Generate File...
- You should see the following message in the main panel: generate succeeded.
PROM File Formatter: Generate Succeeded
|
iMPACT Save Project
- In the folder corresponding to the path you chose as the output file location, you should find the fpga.mcs PROM file.
Overview
Content Tools


