Its for win 10, only
Step 1 - Install Anaconda.
Step 2 - Install package "pyserial"
Step 3 - Install the modules drivers
Step 4 - Place the notebook files inside your "user directory"
Step 5 - Start Jupyter via Anaconda or direct
Step 6 - Alter the comport to yours
Step 7 - Show linenumber / Starting with clearing the caches
Step 7 - Run the Notebook
Einleitung → Bildchen's der module
Warum benutzen wir Anaconda?/ Keine Autovervollständigung oder sinnvolle Fehlerausgabe... . Als extra Schmerz für Anfänger?!!??
IPython (Interactive Python) - is a command shell for interactive computing in multiple programming languages, originally developed for the Python programming language
ipywidgets - Interactive Widgets/GUI elements for the Jupyter Notebook
This manual privides an easy path for the installation
for running the AnalogMax
This manuals goal is to provide a simple instruction for installing the required software to run the demos / for running demos on certain modules.
For the ease of access and programability the programming language Python(ab Version 3.5) has been chosen.
The project Jupyter provides an excellent and open source
Installtion of Jupyter via Anaconda
The demos for the modules rely on the Jupyter ... .
The simplest way to get the demos running in Jupyter is accomplished throw the installion of Anaconda,
this will install more than is needed but Jupyter is also installed without problems or much manual setup.
So running and editing the Demos requires the following steps:
• download and installation of Anaconda
• installation of pyserial throw Anacondas command prompt
• driver installation for the AnalogMax board
• adding the demos to Jupyter
The following description of steps applies in its details to computers running windows, for other
operation systems they are in general similar.
Installation of Anaconda
The Anaconda website provides detailed instructions on how to install the application, just follow the link
http://docs.anaconda.com/anaconda/install/windows/
The instructions and the installer of Anaconda offer you the installation of optional application, they are
not needed to run the demos or edit them.
Installation of Pyserial
At least with Anaconda installation on Windows, pyserial (python serial port support library) is not
included and hast to be installed. This can be done from Anaconda command prompt.
To open the Anaconda command prompt, just press the windows key and type Anaconda prompt. Enter
conda install -c anaconda pyserial
into the command prompt. This starts the search for software dependencies of pyserial, you are asked to
proceed with the installation off these. In the end pyserial is installed and the command prompt is no
longer needed.
Driver installation
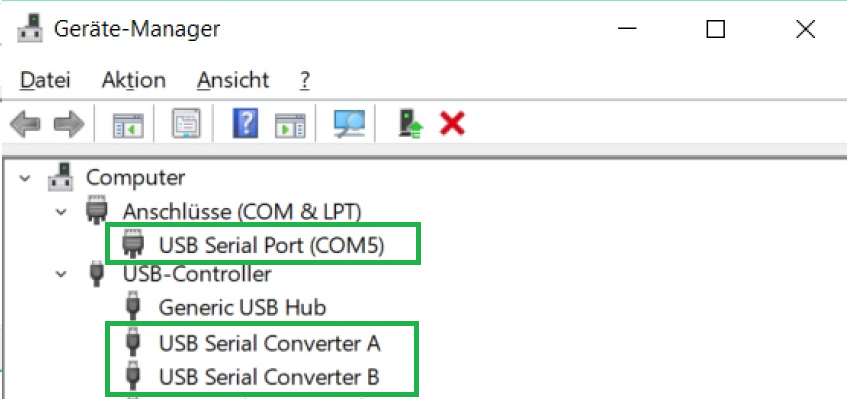
The communication with a module supposes a comport, and therefor a driver is requiered.
When connecting the modul with your computer, windows starts this the Automatic driver Installation,
but often the automatic driver installation fails and the driver needs to be installed manually.
So it is best practice to connect the module, give the opperation system some time, and check
afterwards in the device manager for the apperance of a
"comport" and two devices labeld "USB Serial Convert A and B".
The device manager can be opened either via a right mouse click onto the windows symbole
ore by pressing the windows button and typing device manager.
When instead two devices labeld "Arrow USB Blaster" are listed under "other devices", the manuell
approce has to betaken.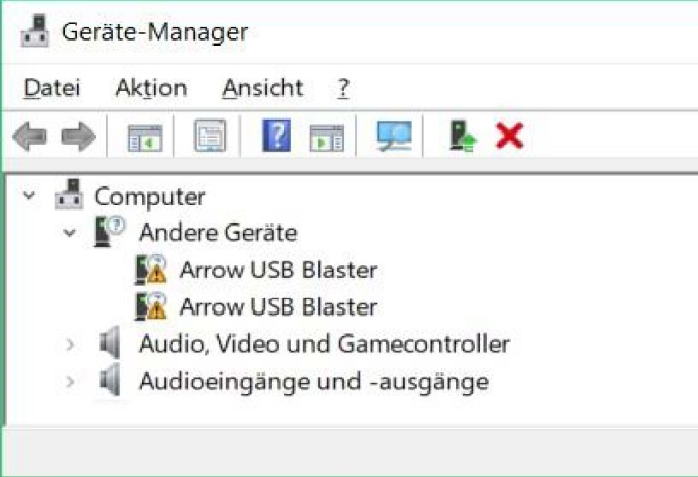
Through a right mouse click on each device, the search for drivers can be started. Just follow the steps
and the installation of the drivers changes the devices name into USB Serial Converter A & B, in addition,
also the a comport is installed.
Check its number (“ComX” ) and memorize it for the later use within the demos.
In dependency to the modules firmware, the driver installation can leads to the appearance of two comports,
in this instance, the higher numbered comport is of importance.
Adding of the demos to jupyter
A convenient way to add the demos into Jupyter is to extract the downloaded file and extrackt the folder
ore files from the distribution archive to your user folder before you start jupyter, for example:
C:\Users\Username\distribution-folder
Opening the demos in jupyter
Alternative kann man auch einfach nur Jupyter starten, es öffnet sich als Konsolenfenster, dass nicht
geschlßen werden, wohl aber minimiert werden darf
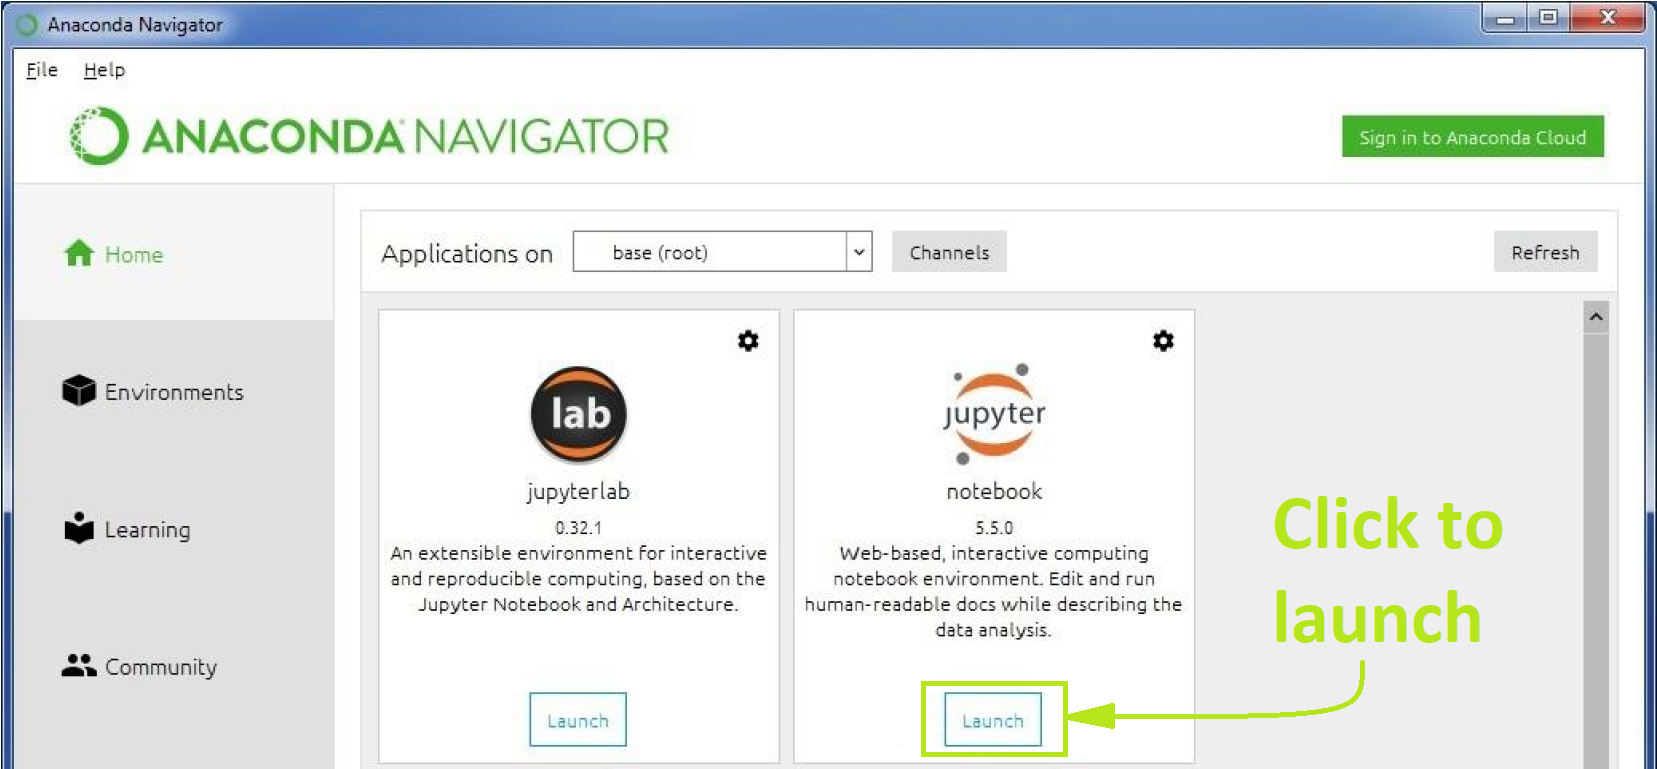
Jupyter is accessible through the Anaconda Navigator, press the windows key and type Anaconda
Navigator. Anaconda opens and to open jupyter, click launch, in the screenshot below, marked within
the red rectangle.
The application opens a tab inside your browser which displays your user folder.
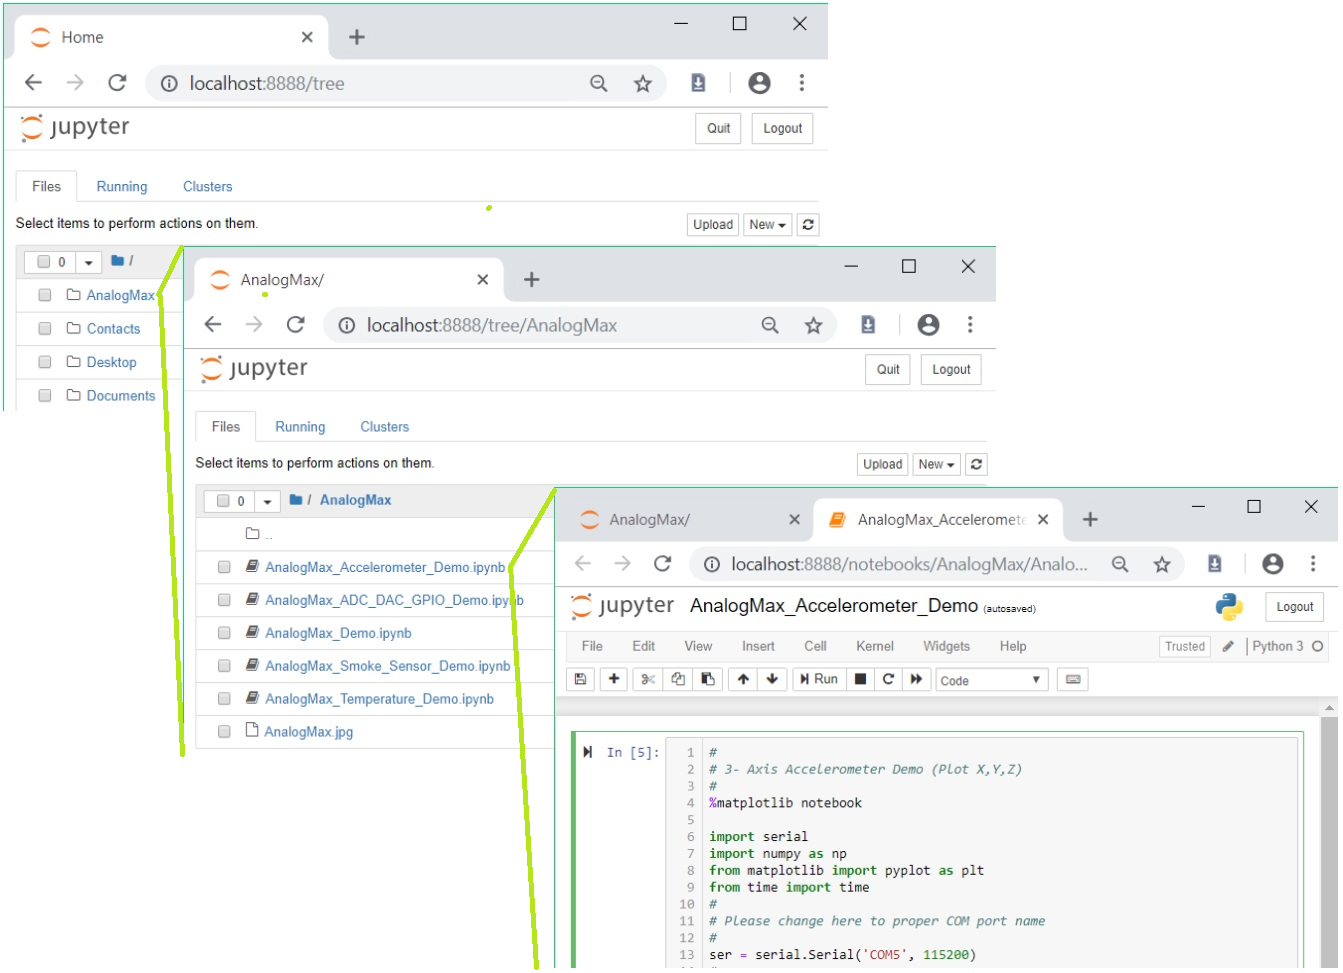
Clicking on the folder AnalogMax opens it.
Choose a demo and another click opens
the demo in a new tab.
Overview
Content Tools