Page History
...
- Run _create_win_setup.cmd/_create_linux_setup.sh and follow instructions on shell:
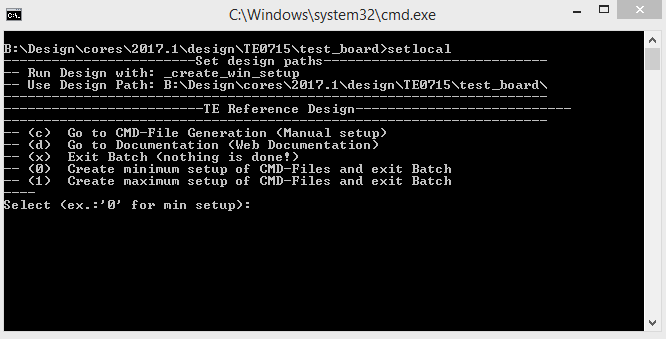
- Press 0 and enter for minimum setup
- (optional Win OS) Generate Virtual Drive or use short directory for the reference design (for example x:\<design name>)
- Create Project
- Select correct device and Xilinx install path on "design_basic_settings.cmd" and create Vivado project with "vivado_create_project_guimode.cmd"
Note: Select correct one, see TE Board Part Files
- Select correct device and Xilinx install path on "design_basic_settings.cmd" and create Vivado project with "vivado_create_project_guimode.cmd"
- Create HDF and export to prebuilt folder
- Run on Vivado TCL: TE::hw_build_design -export_prebuilt
Note: Script generate design and export files into \prebuilt\hardware\<short dir>. Use GUI is the same, except file export to prebuilt folder
- Run on Vivado TCL: TE::hw_build_design -export_prebuilt
- Create Linux (uboot.elf and image.ub) with exported HDF
- HDF is exported to "prebuilt\hardware\<short name>"
Note: HW Export from Vivado GUI create another path as default workspace. - Create Linux images on VM, see PetaLinux KICKstart
- Use TE Template from /os/petalinux
Note: run init_config.sh before you start petalinux config. This will set correct temporary path variable.
- Use TE Template from /os/petalinux
- HDF is exported to "prebuilt\hardware\<short name>"
- Add Linux files (uboot.elf and image.ub) to prebuilt folder
- "prebuilt\os\petalinux\default" or "prebuilt\os\petalinux\<short name>"
Notes: Scripts select "prebuilt\os\petalinux\<short name>", if exist, otherwise "prebuilt\os\petalinux\default"
- "prebuilt\os\petalinux\default" or "prebuilt\os\petalinux\<short name>"
- Generate Programming Files with HSI/SDK
- Run on Vivado TCL: TE::sw_run_hsi
Note: Scripts generate applications and bootable files, which are defined in "sw_lib\apps_list.csv" - (alternative) Start SDK with Vivado GUI or start with TE Scripts on Vivado TCL: TE::sw_run_sdk
Note: See SDK Projects
- Run on Vivado TCL: TE::sw_run_hsi
...
- Open Serial Console (e.g. putty)
- Speed: 115200
- COM Port: Win OS, see device manager, Linux OS see dmesg |grep tty (UART is *USB1)
- Linux Console:
Note: Wait until Linux boot finished For Linux Login use:- User Name: root
- Password: root
- You can use Linux shell now.
- I2C 1 Bus type: i2cdetect -y -r 1
Vivado HW Manager
MGT Reference CLK Counter:
...
PS Interfaces
Activated interfaces:
| Type | Note |
|---|---|
| DDR | --- |
| QSPI | MIO |
| I2C0 | EMIO- NC |
| I2C1 | MIO |
| UART0 | MIO |
| GPIO | MIO |
| SD0 | MIO |
| USB0 | MIO |
| ETH0 | MIO |
| TTC | EMIO |
Constrains
Basic module constrains
...
| Code Block | ||
|---|---|---|
| ||
/include/ "system-conf.dtsi"
/ {
};


/* default */

/* ETH PHY */
&gem0 {

    status = "okay";
        ethernet_phy0: ethernet-phy@0 {
        compatible = "marvell,88e1510";
        device_type = "ethernet-phy";
                reg = <0>;
    };
};


/* USB PHY */
/{
    usb_phy0: usb_phy@0 {
        compatible = "ulpi-phy";
        //compatible = "usb-nop-xceiv";
        #phy-cells = <0>;
        reg = <0xe0002000 0x1000>;
        view-port = <0x0170>;
        drv-vbus;
    };
};

&usb0 {
    dr_mode = "host";
    //dr_mode = "peripheral";
    usb-phy = <&usb_phy0>;
};

/* I2C */
// i2c PLL: 0x70, i2c eeprom: 0x50

&i2c1 {
    rtc@6F {        // Real Time Clock
       compatible = "isl12022";
       reg = <0x6F>;
   };

};
|
Kernel
Activate:
- RTC_DRV_ISL12022
Rootfs
...
Activate:
- i2c-tools
Applications
No additional applications.
...
Overview
Content Tools