Page History
...
| Page properties | ||||
|---|---|---|---|---|
| ||||
Notes :
|
| Excerpt |
|---|
|
...
| Scroll Title | |||||||||||||||||||||||||||||
|---|---|---|---|---|---|---|---|---|---|---|---|---|---|---|---|---|---|---|---|---|---|---|---|---|---|---|---|---|---|
| |||||||||||||||||||||||||||||
|
...
| Scroll Title | |||||||||||||||||||||||||||
|---|---|---|---|---|---|---|---|---|---|---|---|---|---|---|---|---|---|---|---|---|---|---|---|---|---|---|---|
| |||||||||||||||||||||||||||
|
Content
| Page properties | ||||
|---|---|---|---|---|
| ||||
Notes :
|
...
- _create_win_setup.cmd/_create_linux_setup.sh and follow instructions on shell:
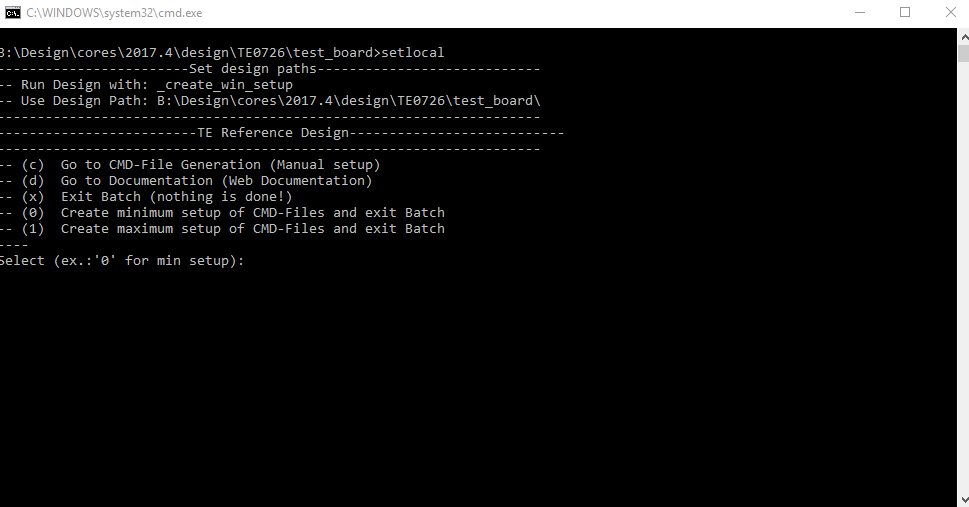
- Press 0 and enter for minimum setup
- (optional Win OS) Generate Virtual Drive or use short directory for the reference design (for example x:\<design name>)
- Create Project
- Select correct device and Xilinx install path on "design_basic_settings.cmd" and create Vivado project with "vivado_create_project_guimode.cmd"
Note: Select correct one, see TE Board Part Files
- Select correct device and Xilinx install path on "design_basic_settings.cmd" and create Vivado project with "vivado_create_project_guimode.cmd"
- Create HDF and export to prebuilt folder
- Run on Vivado TCL: TE::hw_build_design -export_prebuilt
Note: Script generate design and export files into \prebuilt\hardware\<short dir>. Use GUI is the same, except file export to prebuilt folder
- Run on Vivado TCL: TE::hw_build_design -export_prebuilt
- Create Linux (uboot.elf and image.ub) with exported HDF
- HDF is exported to "prebuilt\hardware\<short name>"
Note: HW Export from Vivado GUI create another path as default workspace. - Create Linux images on VM, see PetaLinux KICKstart
- Use TE Template from /os/petalinuxNote: run init_config.sh before you start petalinux config. This will set correct temporary path variable.
- For 128MB and 64MB only:Netboot Offset must be reduced manually, see For 128MB and 64MB only:Netboot Offset must be reduced manually, see Config
- HDF is exported to "prebuilt\hardware\<short name>"
- Add Linux files (uboot.elf and image.ub) to prebuilt folder
- "prebuilt\os\petalinux\default" or "prebuilt\os\petalinux\<short name>"
Notes: Scripts select "prebuilt\os\petalinux\<short name>", if exist, otherwise "prebuilt\os\petalinux\default"
- "prebuilt\os\petalinux\default" or "prebuilt\os\petalinux\<short name>"
- Generate Programming Files with HSI/SDK
- Run on Vivado TCL: TE::sw_run_hsi
Note: Scripts generate applications and bootable files, which are defined in "sw_lib\apps_list.csv" - (alternative) Start SDK with Vivado GUI or start with TE Scripts on Vivado TCL: TE::sw_run_sdk
Note: See SDK Projects
- Run on Vivado TCL: TE::sw_run_hsi
...
- Connect JTAG and power on the carrier with module
- Open Vivado Project with "vivado_open_existing_project_guimode.cmd" or if not created, create with "vivado_create_project_guimode.cmd"
- Type on Vivado TCL Console: TE::pr_program_flash_binfile -swapp u-boot
Note: To program with SDK/Vivado GUI, use special FSBL (zynqmp_fsbl_flash) on setup
optional "TE::pr_program_flash_binfile -swapp hello_te0726" possible - Copy image.ub on SD-Card
- For correct prebuilt file location, see <design_name>/prebuilt/readme_file_location.txt
- Copy init.sh ffmpeg compatible video or aplay compatible audio file on SD-Card
- location: <design_name>/misc/sd/
- Insert SD-Card
SD
Xilinx Zynq devices in CLG225 package do not support SD Card boot directly from ROM bootloader. Use QSPI for primary boot and SD for secondary boot (u-boot)
...
- Open Serial Console (e.g. putty)
- Speed: 115200
- COM Port: Win OS, see device manager, Linux OS see dmesg |grep tty (UART is *USB1)
- Linux Console:
Note: Wait until Linux boot finished For Linux Login use:- User Name: root
- Password: root
- You can use a Linux shell now.
- I2C 1 Bus type: i2cdetect -y -r 5
Bus 0...5 possible - ETH0 works with udhcpc
- USB: insert USB device
- I2C 1 Bus type: i2cdetect -y -r 5
- Camera stream will be enabled via init.sh script on SD
System Design - Vivado
- Start Video with "play <video file>
- "play" is alias to ffmpeg with some parameters for video and audio, type "alias" to see configuration
- for videos with higher resolution, disable audio on ffmpeg configuration
- Start Audio with "aplay <audio files
System Design - Vivado
| Page properties | ||||
|---|---|---|---|---|
| ||||
Note:
|
...
Design specific constraint
Software Design - SDK/HSI
| HTML |
|---|
<!--
optional chapter
separate sections for different apps
--> |
For SDK project creation, follow instructions from:
Application
SDK template in ./sw_lib/sw_apps/ available.
zynqmp_fsbl
TE modified 2018.2 FSBL
- Changes:
- enable VTC and VDMA cores (fsbl_hooks.c)
zynqmp_fsbl_flash
TE modified 2018.2 FSBL
Changes:
- Set FSBL Boot Mode to JTAG
- Disable Memory initialization
u-boot
U-Boot.elf is generated with PetaLinux. SDK/HSI is used to generate Boot.bin.
hello_te0726
Hello TE0726 is a Xilinx Hello World example as an endless loop instead of one console output and TE FSBL screen on HDMI Monitor.
Software Design - PetaLinux
| Page properties | ||||
|---|---|---|---|---|
| ||||
Note:
|
For PetaLinux installation and project creation, follow instructions from:
Commands and actions used to create petalinux project
| Code Block | ||||
|---|---|---|---|---|
| ||||
#
#
#
set_property BITSTREAM.CONFIG.UNUSEDPIN PULLUP [current_design] |
| Code Block | ||||
|---|---|---|---|---|
| ||||
#set_property IOSTANDARD LVCMOS33 [get_ports spdif_tx_o]
#set_property PACKAGE_PIN K15 [get_ports spdif_tx_o]

set_property IOSTANDARD LVCMOS33 [get_ports {GPIO_1_tri_io[*]}]
# GPIO Pins
# GPIO2
set_property PACKAGE_PIN K15 [get_ports {GPIO_1_tri_io[0]}]
# GPIO3
set_property PACKAGE_PIN J14 [get_ports {GPIO_1_tri_io[1]}]
# GPIO4
set_property PACKAGE_PIN H12 [get_ports {GPIO_1_tri_io[2]}]
# GPIO5
set_property PACKAGE_PIN N14 [get_ports {GPIO_1_tri_io[3]}]
# GPIO6
set_property PACKAGE_PIN R15 [get_ports {GPIO_1_tri_io[4]}]
# GPIO7
set_property PACKAGE_PIN L14 [get_ports {GPIO_1_tri_io[5]}]
# GPIO8
set_property PACKAGE_PIN L15 [get_ports {GPIO_1_tri_io[6]}]
# GPIO9
set_property PACKAGE_PIN J13 [get_ports {GPIO_1_tri_io[7]}]
# GPIO10
set_property PACKAGE_PIN H14 [get_ports {GPIO_1_tri_io[8]}]
# GPIO11
set_property PACKAGE_PIN J15 [get_ports {GPIO_1_tri_io[9]}]
# GPIO12
set_property PACKAGE_PIN M15 [get_ports {GPIO_1_tri_io[10]}]
# GPIO13
set_property PACKAGE_PIN R13 [get_ports {GPIO_1_tri_io[11]}]
# GPIO16
set_property PACKAGE_PIN L13 [get_ports {GPIO_1_tri_io[12]}]
# GPIO17
set_property PACKAGE_PIN G11 [get_ports {GPIO_1_tri_io[13]}]
# GPIO18
set_property PACKAGE_PIN H11 [get_ports {GPIO_1_tri_io[14]}]
# GPIO19
set_property PACKAGE_PIN R12 [get_ports {GPIO_1_tri_io[15]}]
# GPIO20
set_property PACKAGE_PIN M14 [get_ports {GPIO_1_tri_io[16]}]
# GPIO21
set_property PACKAGE_PIN P15 [get_ports {GPIO_1_tri_io[17]}]
# GPIO22
set_property PACKAGE_PIN H13 [get_ports {GPIO_1_tri_io[18]}]
# GPIO23
set_property PACKAGE_PIN J11 [get_ports {GPIO_1_tri_io[19]}]
# GPIO24
set_property PACKAGE_PIN K11 [get_ports {GPIO_1_tri_io[20]}]
# GPIO25
set_property PACKAGE_PIN K13 [get_ports {GPIO_1_tri_io[21]}]
# GPIO26
set_property PACKAGE_PIN L12 [get_ports {GPIO_1_tri_io[22]}]
# GPIO27
set_property PACKAGE_PIN G12 [get_ports {GPIO_1_tri_io[23]}]

## DSI_D0_N
#set_property PACKAGE_PIN F13 [get_ports {GPIO_1_tri_io[24]}]
## DSI_D0_P
#set_property PACKAGE_PIN F14 [get_ports {GPIO_1_tri_io[25]}]
## DSI_D1_N
#set_property PACKAGE_PIN F12 [get_ports {GPIO_1_tri_io[26]}]
## DSI_D1_P
#set_property PACKAGE_PIN E13 [get_ports {GPIO_1_tri_io[27]}]
## DSI_C_N
#set_property PACKAGE_PIN E11 [get_ports {GPIO_1_tri_io[28]}]
## DSI_C_P
#set_property PACKAGE_PIN E12 [get_ports {GPIO_1_tri_io[29]}]

## CSI_D0_N
#set_property PACKAGE_PIN M11 [get_ports {GPIO_1_tri_io[30]}]
## CSI_D0_P
#set_property PACKAGE_PIN M10 [get_ports {GPIO_1_tri_io[31]}]
## CSI_D1_N
#set_property PACKAGE_PIN P14 [get_ports {GPIO_1_tri_io[32]}]
## CSI_D2_P
#set_property PACKAGE_PIN P13 [get_ports {GPIO_1_tri_io[33]}]
## CSI_C_N
#set_property PACKAGE_PIN N12 [get_ports {GPIO_1_tri_io[34]}]
## CSI_C_P
#set_property PACKAGE_PIN N11 [get_ports {GPIO_1_tri_io[35]}]
## PWM_R
##set_property PACKAGE_PIN N8 [get_ports {GPIO_1_tri_io[36]}]
## PWM_L
##set_property PACKAGE_PIN N7 [get_ports {GPIO_1_tri_io[37]}]

# PWM_R
set_property PACKAGE_PIN N8 [get_ports PWM_R]
# PWM_L
set_property PACKAGE_PIN N7 [get_ports PWM_L]
set_property IOSTANDARD LVCMOS33 [get_ports PWM_*]
|
| Code Block | ||||
|---|---|---|---|---|
| ||||
set_property IOSTANDARD TMDS_33 [get_ports hdmi_clk_p]
set_property PACKAGE_PIN R7 [get_ports hdmi_clk_p]

set_property IOSTANDARD TMDS_33 [get_ports {hdmi_data_p[*]}]
set_property PACKAGE_PIN P8 [get_ports {hdmi_data_p[0]}]
set_property PACKAGE_PIN P10 [get_ports {hdmi_data_p[1]}]
set_property PACKAGE_PIN P11 [get_ports {hdmi_data_p[2]}]
|
| Code Block | ||||
|---|---|---|---|---|
| ||||
set_property PACKAGE_PIN N11 [get_ports csi_c_clk_p]
set_property IOSTANDARD LVDS_25 [get_ports csi_c_clk_p]
set_property PACKAGE_PIN M9 [get_ports {csi_d_lp_n[0]}]
set_property IOSTANDARD HSUL_12 [get_ports {csi_d_lp_n[0]}]
set_property PACKAGE_PIN N9 [get_ports {csi_d_lp_p[0]}]
set_property IOSTANDARD HSUL_12 [get_ports {csi_d_lp_p[0]}]
set_property PACKAGE_PIN M10 [get_ports {csi_d_p[0]}]
set_property IOSTANDARD LVDS_25 [get_ports {csi_d_p[0]}]
set_property PACKAGE_PIN P13 [get_ports {csi_d_p[1]}]
set_property IOSTANDARD LVDS_25 [get_ports {csi_d_p[1]}]
set_property INTERNAL_VREF 0.6 [get_iobanks 34]
set_property PULLDOWN true [get_ports {csi_d_lp_p[0]}]
set_property PULLDOWN true [get_ports {csi_d_lp_n[0]}]
# RPI Camera 1
create_clock -period 6.250 -name csi_clk -add [get_ports csi_c_clk_p]
# RPI Camera 2.1
#create_clock -period 1.875 -name csi_clk -add [get_ports csi_c_clk_p]
|
| Code Block | ||||
|---|---|---|---|---|
| ||||
set_property ASYNC_REG true [get_cells {zsys_i/audio/axi_i2s_adi_0/U0/ctrl/tx_sync/out_data_reg[4]}]
set_property ASYNC_REG true [get_cells {zsys_i/audio/axi_i2s_adi_0/U0/ctrl/SDATA_O_reg[0]}]
set_false_path -from [get_clocks clk_fpga_0] -to [get_clocks clk_fpga_3]
set_false_path -from [get_clocks clk_fpga_3] -to [get_clocks clk_fpga_0]

set_false_path -from [get_pins {zsys_i/axi_reg32_0/U0/axi_reg32_v1_0_S_AXI_inst/slv_reg16_reg[1]/C}] -to [get_pins zsys_i/video_in/axis_raw_demosaic_0/U0/colors_mode_i_reg/D]
set_false_path -from [get_pins zsys_i/video_in/csi_to_axis_0/U0/lane_align_inst/err_req_reg/C] -to [get_pins zsys_i/video_in/csi2_d_phy_rx_0/U0/clock_upd_req_reg/D]

set_false_path -from [get_pins {zsys_i/video_in/axi_vdma_0/U0/I_PRMRY_DATAMOVER/GEN_S2MM_FULL.I_S2MM_FULL_WRAPPER/GEN_INCLUDE_REALIGNER.I_S2MM_REALIGNER/GEN_INCLUDE_SCATTER.I_S2MM_SCATTER/sig_max_first_increment_reg[2]/C}] -to [get_pins zsys_i/video_in/axi_vdma_0/U0/I_PRMRY_DATAMOVER/GEN_S2MM_FULL.I_S2MM_FULL_WRAPPER/GEN_INCLUDE_REALIGNER.I_S2MM_REALIGNER/GEN_INCLUDE_SCATTER.I_S2MM_SCATTER/sig_btt_eq_0_reg/D]
set_false_path -from [get_pins {zsys_i/video_in/axi_vdma_0/U0/I_PRMRY_DATAMOVER/GEN_S2MM_FULL.I_S2MM_FULL_WRAPPER/GEN_INCLUDE_REALIGNER.I_S2MM_REALIGNER/GEN_INCLUDE_SCATTER.I_S2MM_SCATTER/sig_btt_cntr_dup_reg[1]/C}] -to [get_pins zsys_i/video_in/axi_vdma_0/U0/I_PRMRY_DATAMOVER/GEN_S2MM_FULL.I_S2MM_FULL_WRAPPER/GEN_INCLUDE_REALIGNER.I_S2MM_REALIGNER/GEN_INCLUDE_SCATTER.I_S2MM_SCATTER/sig_btt_eq_0_reg/D]
|
Software Design - SDK/HSI
| HTML |
|---|
<!--
optional chapter
separate sections for different apps
--> |
For SDK project creation, follow instructions from:
Application
SDK template in ./sw_lib/sw_apps/ available.
zynq_fsbl
TE modified 2018.2 FSBL
- Changes:
- enable VTC and VDMA cores (fsbl_hooks.c)
zynq_fsbl_flash
TE modified 2018.2 FSBL
Changes:
- Set FSBL Boot Mode to JTAG
- Disable Memory initialization
u-boot
U-Boot.elf is generated with PetaLinux. SDK/HSI is used to generate Boot.bin.
hello_te0726
Hello TE0726 is a Xilinx Hello World example as an endless loop instead of one console output and TE FSBL screen on HDMI Monitor.
Software Design - PetaLinux
| Page properties | ||||
|---|---|---|---|---|
| ||||
Note:
|
For PetaLinux installation and project creation, follow instructions from:
- PetaLinux KICKstart
- petalinux-create -t project -n petalinux --template zynq
- copy hdf file to petalinux directory
- cd petalinux
- petalinux-config --get-hw-description
- leave default configuration and select "<Exit>"
- petalinux-create -t apps -n startup --enable
- copy/create startup app files
- petalinux-create -t apps -n rpicam --enable
- copy/create rpicam app files
- petalinux-create -t modules -n te-audio-codec --enable
- copy/create te-audio-codec module files
- copy/modify project-spec/meta-user/recipes-bsp/device-tree/files/system-user.dtsi
- petalinux-config -c rootfs
- Enable Filesystem Packages → Base → i2c-tools → i2c-tools and other apps needed for your system
- Save configuration and exit config
- petalinux-config -c kernel
- CONFIG_USB_USBNET
- CONFIG_USB_NET_SMSC95XX
- CONFIG_USBIP_CORE
- CONFIG_FB_SIMPLE
- SND_SIMPLE_CARD
- CONFIG_SND_SOC_ADI_AXI_I2S
- petalinux-build
Config
For 64MB variant only:
...
See: \os\petalinux\project-spec\meta-user\recipes-apps\startup\files
rpicam
Application used to enable and configure Raspbery Pi camera module
Add on new project:
- petalinux-create -t apps -n startup --enable
- copy/create startup app files
rpicam
Application used to enable and configure Raspbery Pi camera module
See: \os\petalinux\project-spec\meta-user\recipes-apps\rpicam\files
Add on new project:
- petalinux-create -t apps -n rpicam --enable
- copy/create rpicam app files
Kernel Modules
te-audio-codec
Simple module stab to use audio interface.
See: See: \os\petalinux\project-spec\meta-user\recipes-apps\rpicam\files
Kernel Modules
modules\te-audio-codec\files
Add on new project:
- petalinux-create -t modules -n te-audio-codec --enable
- copy/create te-audio-codec
...
- module files
Core base files
profile
Simple profile for aliasSimple module stab to use audio interface.
See: \os\petalinux\project-spec\meta-user\recipes-modulescore\tebase-audio-codecfiles\files\profile
Add on new project:
- copy/create profile file
Additional Software
| Page properties | ||||
|---|---|---|---|---|
| ||||
| Note: |
...
Overview
Content Tools