Overview
The Vivado® Design Suite allows you to create projects based on specific boards. Trenz Electronic provides Vivado Board Part files in the download area. Please choose the BSP folder under the proper module.
There are two options for installing the Board Part files
- Option1: Use Trenz Electronic Reference Design with local board part file
- Option2: Install into a User Repository
- Option3: Install into the Vivado installation
Attention: The board part files of our reference designs are for the corresponding Vivado version of the project delivery. It's possible to use them with other versions, but maybe it's not working correctly with other Vivado versions.
Option1: Use Trenz Electronic Reference Design with local board part file
The board part file will be set for the local project, if the project is generated with the provided scripts from the project delivery. More information on: Project Delivery
Option2: Install into a User Repository
This Option allows you to install the Vivado Board Part files to any location of your choosing. The disadvantage is that it required an additional command to point the tools to your repository.
Attention: This description s for Vivado 2015.1 and higher. Older Vivado versions used other variable names, so some changes are necessary.
- Copy the init.tcl from this Website to your Vivado Script location: <installdir>/vivado/<version>/scripts/. If this file exists on your installation path, copy only the content into the existing tcl-file.
- Copy the Board part files folder from the reference project (<reference_design>/board_files/) into the folder C:/TE (the folder location can be changed in the init.tcl script). The *.csv file from <reference_design>/board_files/ is not necessary for this way.
Start your Vivado Version and the TCL-console printout should be the following:
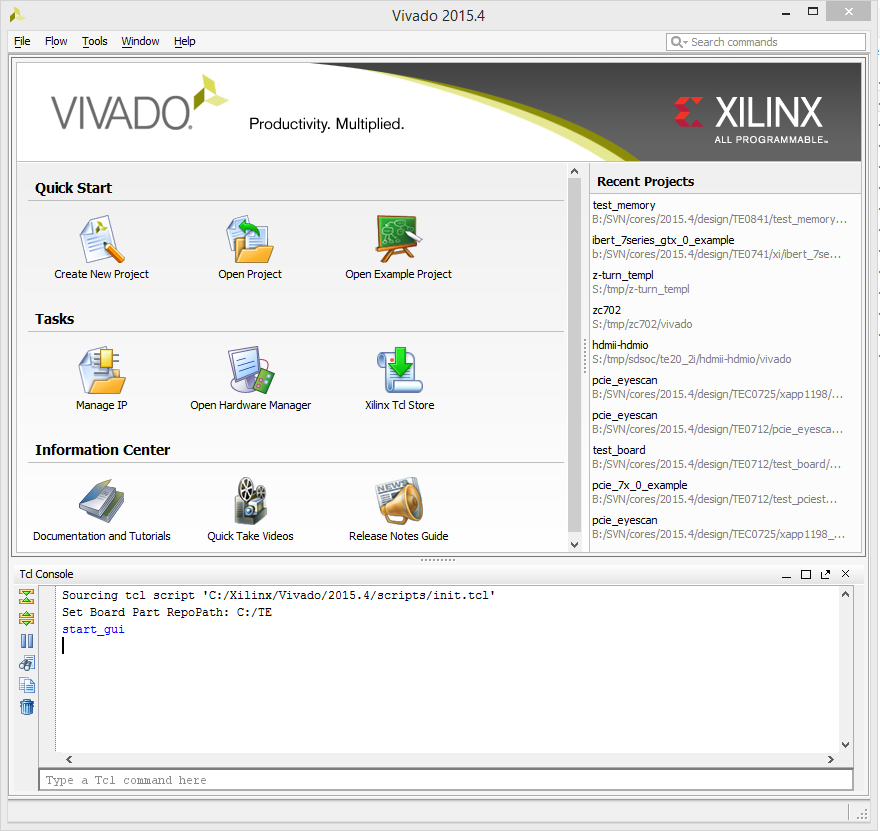 Please make sure you use plain ASCII text editor when creating the init.tcl file, any non ASCII character in the file will make Vivado to freeze on startup.
A working init.tcl file is provided in the archive with this tutorial. With this method you can set up a permanent initialization TCL that is read by Vivado each time it launches. Details about the init.tcl file are included in UG835 Vivado Design Suite Tcl Command Reference Guide. UG835 describes where to put the init.tcl file.
Option3: Install into the Vivado installation
This is the quickest option, but it is not recommended by Xilinx. Use at your own risk.
- Copy the Board part files folder from the reference project (<reference_design>/board_files/) into the folder <installdir>/vivado/<version>/data/boards/board_files/. The *.csv file from <reference_design>/board_files/ is not necessary for this way.
Test in Vivado
Regardless of which method you choose, the new boards should now be visible in Vivado 2015.1 or higher for vendor trenz.biz . To test this out, do the following.
- Launch Vivado.
- Select Create New Project.
- Click Next> to get started.
- Set the project name and location. Press Next>.
- Select project type Click Next>.
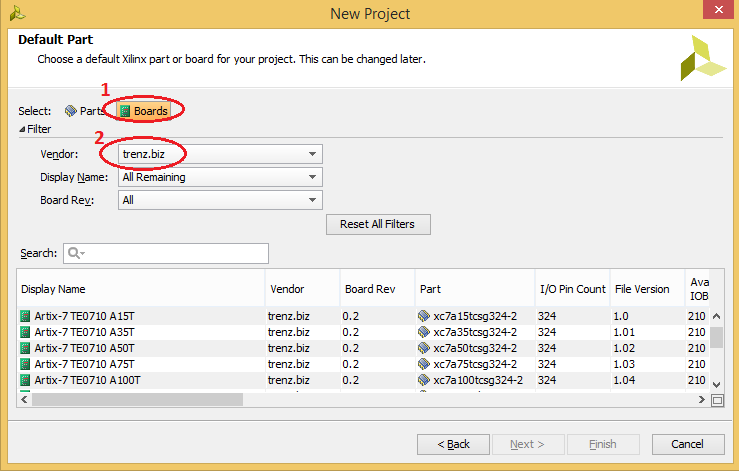
- At the Default Part screen,
a, Click Boards under Specify.
b, Click trenz.biz under Vendor.
The options should appear as shown.
For more information about this capability, please refer to the following Quick Take video.
http://www.xilinx.com/training/vivado/using-vivado-with-xilinx-evaluation-boards.htm
Software Requirements
The software used is
- Xilinx Vivado 2015.4 or higher
Overview
Content Tools